What is TrustTunnel
Step-by-step guide to TrustTunnel: in 60–90 minutes you’ll understand what this protocol is, how it works, how it differs from traditional VPNs, and how to set up the server and clients (Android, iOS, Windows, Linux, macOS) with real TLS 1.3 and HTTPS camouflage.
Content of the article
- Introduction
- Preparation
- Basic concepts
- Step 1: register and buy a server on vpn.how
- Step 2: link domain and issue let's encrypt certificate
- Step 3: install and basic configuration of trusttunnel server
- Step 4: create client credentials (client id + secret)
- Step 5: install client on smartphone (trusttunnel flutter client)
- Step 6: install client on pc (trusttunnel cli)
- Result verification
- Common issues and fixes
- Additional features
- Faq
- Conclusion
Introduction
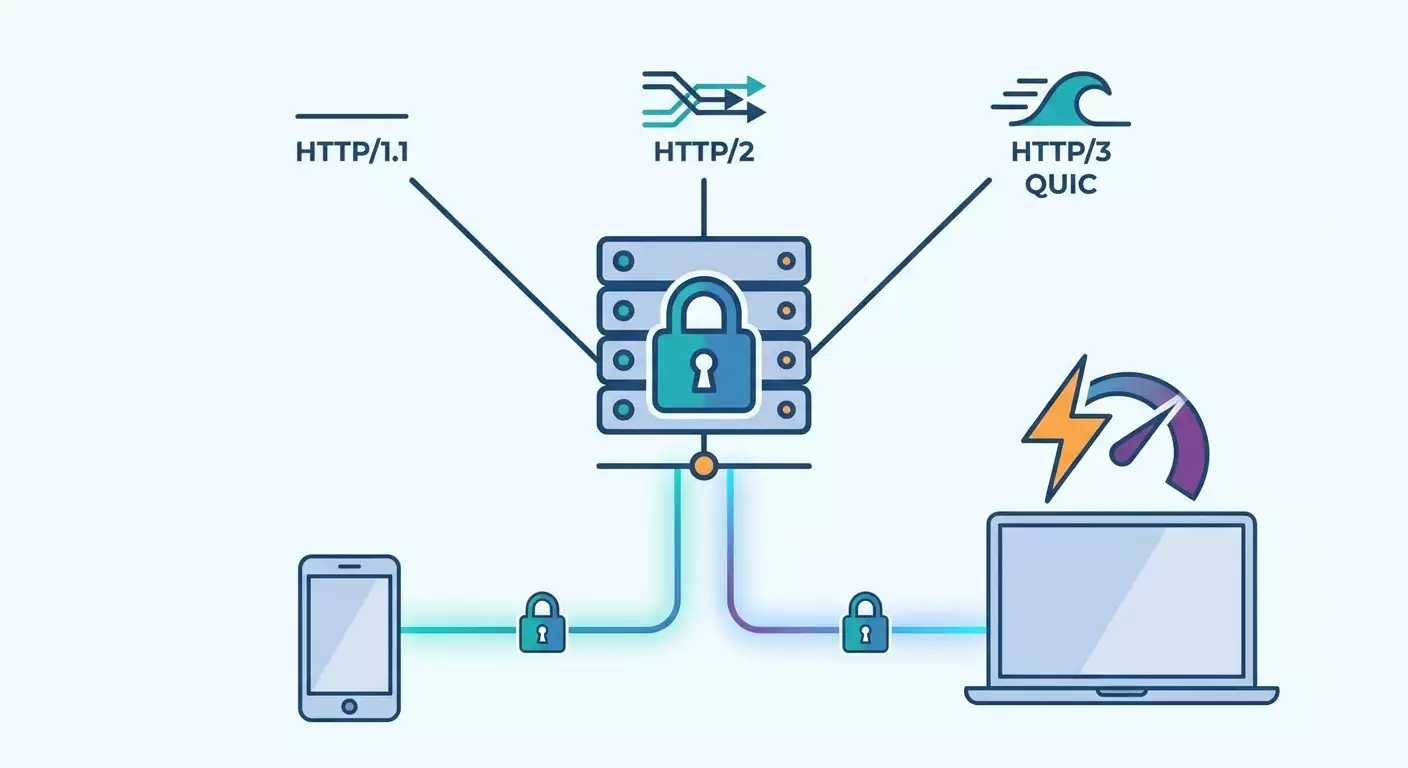
What is TrustTunnel — a next-generation modern VPN protocol that disguises traffic as regular HTTPS web browsing and supports HTTP/1.1, HTTP/2, and HTTP/3 (QUIC). In this step-by-step guide, you’ll learn how TrustTunnel works, how it differs from classic VPNs, and set up a complete solution: a server with genuine TLS 1.3 and clients for smartphones and PCs. In the end, you’ll have a stable and secure connection that looks like normal website visits to external observers.
What you’ll get: a clear understanding of the technology, a ready server with Let's Encrypt certificates, TrustTunnel set up for Android/iOS via the TrustTunnel Flutter Client app, and for Windows/Linux/macOS via TrustTunnel CLI, plus proven performance and security best practices.
Who this guide is for: users who need maximum traffic disguise as HTTPS and connection stability; specialists wanting to grasp the technical details of TLS 1.3, HTTP/3, and multiplexing; anyone who values privacy and predictable performance.
What you should know beforehand: basic computer and smartphone skills; how to access a server via SSH; understanding what a domain and DNS A/AAAA records are. We’ll explain everything simply and provide ready-to-use commands.
How long it takes: 60–90 minutes for the full cycle from buying a server to connecting clients and testing.
Tip: Keep a text editor handy. Jot down your domain, IP, Client ID, and Secret. This will save you time during setup.
Preparation
Required tools and access:
- An account on vpn.how to purchase a server with TrustTunnel support.
- A domain name you control (any registrar). A subdomain will also work.
- Access to the vpn.how server control panel and SSH access (optional for manual methods).
- An Android or iOS smartphone and a Windows, Linux, or macOS computer to install clients.
System requirements:
- Server: 1 vCPU, 1–2 GB RAM, 10 GB disk, public IPv4; IPv6 support preferred. Ports 80/TCP and 443/TCP, plus 443/UDP open for HTTP/3.
- Clients: Android 8+/iOS 13+; Windows 10+/Linux x86_64/arm64/macOS 12+. Internet connection without local blocks on ports 443 TCP/UDP.
What to download/install:
- TrustTunnel Flutter Client on your smartphone (via app store).
- TrustTunnel CLI on your PC (via installer/package manager; available in vpn.how panel).
Backups:
- Save Client ID and Secret securely in a password manager.
- Export server configuration from vpn.how panel after initial setup.
⚠️ Warning: Don’t share your Client ID and Secret with anyone. These grant access to your secure tunnel.
✅ Check: You have a purchased vpn.how server (or plan to buy), a domain ready to link, and confirmed ports 80 and 443 aren’t blocked by hosting or firewall.
Basic Concepts
Key terms:
- TrustTunnel — a VPN protocol disguising traffic as normal HTTPS, supporting HTTP/1.1, HTTP/2, and HTTP/3 (QUIC) with real TLS 1.3.
- TLS 1.3 — modern encryption protocol ensuring privacy and integrity, with fast handshakes and strong ciphers.
- HTTP/3 (QUIC) — a UDP-based protocol reducing latency and improving resilience against packet loss.
- Stream multiplexing — simultaneous transmission of multiple independent streams inside one secure connection.
- Client ID and Secret — client credentials for authenticating to the TrustTunnel server.
Main principle: client and server establish a real TLS 1.3 connection using your domain, then run a "normal" HTTP dialogue on top. The app’s traffic is encapsulated in HTTP streams that appear as regular requests and responses to outsiders. Third-party providers see standard HTTPS site visits, not "special VPN traffic."
How it differs from classic VPNs: instead of recognizable signatures (like some VPN protocols), TrustTunnel visually and behaviorally mimics normal web browsing. Your traffic is indistinguishable from ordinary HTTPS, especially when using HTTP/2/HTTP/3 and a real Let's Encrypt certificate.
Technical highlights: supports TCP and UDP tunneling, multiplexing, real CA certificates, strong TLS 1.3 ciphers, operating on ports 80/443, automatic switching between HTTP/1.1, HTTP/2, and HTTP/3, minimal overhead, and stable performance.
Suitable for: when you need traffic disguise, predictability, compatibility with standard web infrastructure, and reliable operation under high latency or unstable networks.
Tip: If in doubt, leave HTTP version to "Auto." The client will select the best mode based on network and server capabilities.
✅ Check: You understand that TrustTunnel uses real TLS 1.3, looks like regular HTTPS, and how it differs from traditional VPN protocols.
Step 1: Register and Buy a Server on vpn.how
Goal
Get a ready server with TrustTunnel support, panel access, and basic configuration.
Step-by-step
- Log into your vpn.how account. If you don’t have one, register with your email and password.
- Go to the servers section and click "Buy Server."
- Choose a plan that meets requirements: 1 vCPU, 1–2 GB RAM, 10 GB disk, open ports 80/443.
- In roles/packages, check "TrustTunnel Server."
- Confirm purchase and wait for automatic deployment (usually 2–5 minutes).
- Open your server card: note down the public IPv4 (and IPv6 if available).
- Check service status: confirm "TrustTunnel" shows as "installed/to be configured."
Important points
Check location: pick a data center close to you for lower latency.
Estimate traffic: if you plan video calls or heavy usage, choose a plan with enough bandwidth.
Tip: Save the IP address in a note; you’ll need it to set up DNS in the next step.
Expected result
You have a deployed server in vpn.how panel, can see its IP, and TrustTunnel shows as an installed component.
Possible issues and solutions
- Server not showing — refresh the page, wait 5 minutes, check your email for readiness notifications.
- TrustTunnel not installed — click "Install" in components section and wait for status "Ready."
✅ Check: Server panel displays IP address and TrustTunnel component with status "installed/to configure."
Step 2: Link Domain and Issue Let's Encrypt Certificate
Goal
Connect your domain to the server and get a real TLS 1.3 certificate from Let's Encrypt for believable HTTPS disguise.
Step-by-step
- Log into your domain registrar panel and create an A record: for example, vpn.example.com pointing to your server's IPv4. If you have IPv6, set an AAAA record for the same subdomain.
- Save DNS changes and wait for propagation — usually 5–15 minutes, sometimes up to an hour.
- Open vpn.how panel, find the "Domain/SSL" section in your server card.
- Enter your subdomain (e.g., vpn.example.com) in the "Primary TrustTunnel Domain" field and save.
- Click "Issue Let's Encrypt Certificate." Confirm the server can handle HTTP check on port 80.
- Wait for status "Certificate issued" and "TLS active." Usually takes 1–2 minutes.
- Make sure the protocol shows as "TLS 1.3" with a valid CA chain.
Important points
Open ports: port 80/TCP must be accessible from the Internet to issue the certificate.
DNS time: DNS changes can take a while. Clear your device's DNS cache or restart network if needed.
⚠️ Warning: If your server firewall blocks port 80, temporarily allow incoming HTTP connections for Let's Encrypt verification. After issuance, you can close the port if the panel doesn’t require automatic renewal via HTTP-01 every 60–90 days.
Tip: Use a single subdomain exclusively for TrustTunnel. It simplifies management and certificate renewals.
Expected result
Your domain points to the server, Let's Encrypt certificate is issued and active, and your server is ready for encrypted TLS 1.3 connections.
Possible issues and solutions
- Certificate didn’t issue — check DNS points to server IP and port 80 is open. Wait 10–15 minutes and try again.
- Panel says "domain not verified" — make sure you're not using a CDN proxy; disable it temporarily for certificate issuance.
✅ Check: In SSL section, see "Active" status and "TLS 1.3." Domain opens in browser with a green padlock (may show a panel placeholder page).
Step 3: Install and Basic Configuration of TrustTunnel Server
Goal
Enable TrustTunnel with the right HTTP modes, TLS 1.3, and correct ports for TCP/UDP.
Step-by-step
- In vpn.how panel, go to "TrustTunnel" section and click "Configure."
- Set service domain: enter your subdomain, e.g., vpn.example.com.
- Enable "HTTP/1.1," "HTTP/2," and "HTTP/3 (QUIC)." Leave HTTP version mode at "Auto."
- Ports: set 443/TCP for HTTPS and 443/UDP for QUIC. Ensure your firewall allows incoming traffic on these ports.
- Under "TLS," select "Use active Let's Encrypt certificate." Confirm status "Ready."
- Enable "Stream multiplexing." Leave streams count at default "Auto," optimize later if needed.
- Save settings and click "Restart TrustTunnel."
- Check logs in panel: confirm "Service running," no TLS or port errors.
Important points
Compatibility: keep HTTP/1.1 enabled for rare networks and proxies where HTTP/2/3 might be limited.
Performance: HTTP/3 over UDP port 443 offers the lowest latency and better packet loss resilience.
Tip: For mobile clients, don’t disable HTTP/3 — it works noticeably more stable on variable networks.
Expected result
TrustTunnel listens on 443/TCP and 443/UDP, uses TLS 1.3, and is ready to accept client connections.
Possible issues and solutions
- Port 443 busy — stop other services occupying 443 or change their port, then restart TrustTunnel.
- TLS error — check the certificate is active and domain matches. Reissue certificate if domain names don’t match.
✅ Check: No errors in service logs. Ports 443/TCP and 443/UDP show as LISTEN, TLS 1.3 status active.
Step 4: Create Client Credentials (Client ID + Secret)
Goal
Generate credentials for secure client authentication to the server.
Step-by-step
- In vpn.how panel, go to the "TrustTunnel Users" section.
- Click "Add Client." Enter a profile name, e.g., phone-ivan or laptop-olga.
- Click "Create." The system will generate unique Client ID and Secret.
- Save these credentials. Click "Show as QR" for easy mobile setup.
- Optionally, set limits: max speed, expiration date, simultaneous connection restrictions.
- Click "Save" and confirm client is active.
Important points
Privacy: store Client ID and Secret in a password manager. Don’t send them over open chats.
Tip: Create a separate profile for each device. This makes access management easier.
Expected result
You have at least one active client profile with Client ID and Secret ready to connect.
Possible issues and solutions
- Forgot Secret — generate a new one and delete the old access.
- Client marked inactive — check expiration date and activate the profile.
✅ Check: Client list shows your created profile as "active," with Client ID, Secret, or QR code available.
Step 5: Install Client on Smartphone (TrustTunnel Flutter Client)
Goal
Connect your Android/iOS device to your TrustTunnel server with real TLS and HTTPS disguise.
Step-by-step
- Open your phone’s app store and install "TrustTunnel Flutter Client."
- Launch the app. On the main screen, tap "Add Server."
- Enter domain: vpn.example.com. Leave "Port" at 443.
- Select HTTP mode: "Auto (1.1/2/3)."
- Enter Client ID from the panel and Secret in the respective fields.
- Tap "Save" and select the new profile.
- Tap "Connect." Allow VPN profile creation when prompted by the system.
- Wait for "Connected" status. Connection details will show "TLS 1.3," "HTTP/2," or "HTTP/3" depending on the situation.
Important points
Permissions: On iOS, confirm VPN configuration addition on first run. On Android, allow VPN and background operation.
Tip: Enable "Auto-connect on startup" in app settings for continuous protection.
Expected result
Your smartphone connects to your server. Tunnel is active with TLS 1.3 encryption, and HTTP version auto-selected.
Possible issues and solutions
- Authentication error — check Client ID/Secret carefully, watch out for typos and extra spaces.
- No connection over HTTP/3 — ensure 443/UDP is accessible. If temporarily blocked, the client will fall back to HTTP/2 or 1.1.
✅ Check: App shows "Connected," your domain and TLS 1.3 appear in connection details. Internet works smoothly through the tunnel.
Step 6: Install Client on PC (TrustTunnel CLI)
Goal
Connect your Windows, Linux, or macOS machine to TrustTunnel, with optional auto-start setup.
Step-by-step
- Download and install TrustTunnel CLI via vpn.how panel ("Clients" section): choose your OS and follow the installer instructions.
- Open your terminal (Command Prompt on Windows, Terminal on macOS/Linux).
- Create a profile: run the add command, specify domain vpn.example.com, port 443, HTTP mode "auto," and enter Client ID and Secret.
- Save the profile with a name like pc-main.
- Start the connection: run the connect command for pc-main. Allow VPN adapter creation when prompted on first launch.
- Check status: ensure it shows "connected," TLS 1.3 active, and the current HTTP version.
- Enable auto-launch (optional): set auto-start flag for the profile or system service if offered by the CLI.
Important points
Drivers: first launch may install a virtual network adapter. Confirm driver installation.
Tip: If switching between networks often, use a short auto-reconnect command with an interval to keep the tunnel alive automatically.
Expected result
Your PC connects to TrustTunnel, encrypts traffic with TLS 1.3, and uses the optimal HTTP version. Auto-start enabled if desired.
Possible issues and solutions
- No admin rights — run terminal as administrator or with sudo.
- Corporate antivirus conflict — add TrustTunnel CLI to exceptions and allow virtual adapter installation.
✅ Check: Status command shows "connected," your IP in the browser changes to server IP, websites load reliably.
Result Verification
Checklist
- vpn.how server deployed, ports 443/TCP and 443/UDP accessible.
- Domain linked, Let's Encrypt certificate active, TLS 1.3 in status.
- Clients on smartphone and PC connect without errors.
- Traffic looks like regular HTTPS (browser sees standard ports and TLS).
How to test
- Open any website and check for fast loading.
- Test HTTP/3: run a check supporting HTTP/3 or view current version in client details.
- Compare ping latency to a known resource with tunnel on and off: a small drop indicates low overhead.
- Check stability: reboot your router or switch to mobile network. Tunnel should reconnect automatically.
Success indicators
- Stable connection for 10–15 minutes without drops.
- Minimal extra latency (usually 5–15 ms).
- Real TLS 1.3 and valid CA chain (Let's Encrypt).
Tip: Enable status notifications in the mobile client for constant monitoring. You’ll know immediately if reconnection occurs.
✅ Check: All checklist items met; connections consistently establish on different devices.
Common Issues and Fixes
- Issue: Certificate won’t issue. Cause: Port 80 closed or DNS not updated. Fix: Allow port 80/TCP in firewall, verify A/AAAA records, wait 10–30 minutes, retry issuing.
- Issue: Client shows "Unauthorized." Cause: Incorrect Client ID/Secret or profile disabled. Fix: Re-copy credentials carefully with no spaces, activate profile in panel.
- Issue: HTTP/3 not working. Cause: 443/UDP blocked or ISP blocks UDP. Fix: Open 443/UDP or use HTTP/2/1.1 ("Auto" mode).
- Issue: High latency. Cause: Remote data center or weak internet. Fix: Choose closer server region, enable HTTP/3, check connection quality.
- Issue: Slow download speed. Cause: Profile limits or server overload. Fix: Increase limits, upgrade plan, check system resources.
- Issue: Frequent reconnections. Cause: Unstable client network. Fix: Enable auto-retry, use HTTP/3, lower keep-alive timeouts.
- Issue: Conflict with another web server on port 443. Cause: Port occupied. Fix: Move other service to different port or use TrustTunnel as frontend with reverse proxy if advanced config is possible.
Tip: If unsure where the bottleneck is, make one change at a time and test. This helps identify the cause quickly.
⚠️ Warning: Don’t disable certificate verification in clients: you’ll lose MITM protection and the HTTPS disguise.
Additional Features
Advanced settings
- Multiplexing: increase parallel streams for heavy workloads with many simultaneous connections.
- DNS policy: choose DoH or DoQ in clients for end-to-end encrypted domain resolution.
- Split tunneling: exclude local resources from the tunnel to reduce load and speed access to nearby devices.
- Per-app VPN (mobile): route traffic from selected apps only through TrustTunnel.
Optimization
- BBR (Linux): enable this modern congestion control algorithm to enhance bandwidth.
- MTU: if fragmentation occurs, reduce MTU in clients by 40–80 bytes and check connection stability.
- QUIC parameters: increase windows and buffers on high-latency networks to boost throughput.
What else you can do
- Create separate profiles for guests with limited permissions and expiration dates.
- Enable expiration notifications for Let's Encrypt certificates.
Tip: Test changes in a "sandbox"—create a temporary client profile and verify new settings there.
✅ Check: After optimization, you observe improved latency and stable speeds without log errors.
FAQ
1. How can I be sure traffic is really disguised as HTTPS? The client and server use real TLS 1.3 with valid CA chains. Outside, the connection looks like normal access to your domain on 443/TCP or 443/UDP, behaving like browser traffic.
2. How to choose HTTP version? Leave it at "Auto." The client picks HTTP/3 whenever possible, else falls back to HTTP/2 or 1.1. Manual selection is only needed for troubleshooting.
3. How are Let's Encrypt certificates renewed? The vpn.how panel automatically renews certificates. Make sure the verification method (usually HTTP-01 on port 80/TCP) is available or use the panel’s built-in renewal feature.
4. What if I don’t have my own domain? Register one at any registrar or use a subdomain provided by your ISP. A domain is required to obtain a real certificate and credible disguise.
5. Can I use TCP only? Yes. If UDP is not an option, keep 443/TCP. The HTTPS disguise remains; latency might be a bit higher.
6. Where are logs stored? In vpn.how panel under TrustTunnel section, you have access to logs. Retain logs only as long as necessary and restrict access.
7. How to move server to a different IP? Set up a new server, update DNS A/AAAA records to the new IP, reissue the certificate, then switch clients to the new domain or keep the old one if only IP address changed in DNS.
8. How to secure the control panel? Enable two-factor authentication, use a strong password, restrict IP access, and regularly review active sessions.
9. Does TrustTunnel log traffic? By default, only technical service logs are kept. Traffic content is encrypted with TLS and inaccessible. Configure logging policies according to privacy requirements.
10. How to quickly disable a device? Deactivate the corresponding client profile (Client ID) in the panel. The connection will drop and new sessions won’t be allowed.
Conclusion
Now you know what TrustTunnel is, how it masks VPN traffic as regular HTTPS using TLS 1.3 with HTTP/1.1, HTTP/2, and HTTP/3 (QUIC) support, and how it differs from classic VPNs. You’ve set up your domain, issued a Let's Encrypt certificate, activated TrustTunnel server, created Client ID and Secret, installed clients on smartphone and PC, tested connection quality, and optimized performance. Your traffic is now indistinguishable from regular web browsing, with expected speed and stability.
What’s next: add profiles for family or team, enable certificate renewal alerts, configure split tunneling and DoH/DoQ for extra privacy. Experiment with multiplexing and HTTP/3 settings to maximize performance.
Tip: Check logs and stats monthly to spot load changes early and scale without downtime.
Ready to get hands-on and enjoy a stable, secure, and convincingly disguised connection? Simply purchase a VPN server with TrustTunnel support on vpn.how and follow this guide. You’ve got this!