What is VLESS+Reality
A step-by-step guide to VLESS+Reality: what it is, how it works, how it differs from VMess, and why it's resistant to blocking and DPI. In 60–90 minutes, you'll set up a server on Xray and connect clients like v2rayNG, Streisand/V2Box, and v2rayN/Nekoray. At the end — testing and troubleshooting.
Content of the article
- Introduction
- Preparation
- Basic concepts
- Step 1: preparing the server and access
- Step 2: installing xray-core
- Step 3: generating reality keys and vless uuid
- Step 4: creating the vless+reality config
- Step 5: firewall and network setup
- Step 6: connecting android via v2rayng
- Step 7: connecting windows via v2rayn or nekoray
- Step 8: connecting ios via streisand or v2box
- Step 9: connecting linux and macos via nekoray
- Why vless+reality resists blocking and how obfuscation works
- How reality masks vpn traffic as https
- Advantages of vless+reality and who it’s for
- Verifying your setup
- Common errors and fixes
- Bonus features
- Faq
- Conclusion
Introduction
This step-by-step guide will help you understand what VLESS+Reality is, how it differs from VMess, how Reality disguises traffic as regular HTTPS, why this combo is considered one of the most resilient against blocking and network analysis, and how to set up your own server and connect clients. By the end, you'll have a fully functional VLESS+Reality server running on Xray with a neat configuration, connected to devices on Android, iOS, Windows, Linux, and macOS through supported clients.
This guide is perfect if you're after maximum connection stealth, resistance to DPI analysis, minimal encryption overhead, and modern transport-level TLS obfuscation. We keep it simple and straightforward—no jargon. No prior experience needed: all commands and clicks are detailed.
What you should know beforehand: basic command copying skills, how to SSH into a remote server, and where to find network and firewall settings. Estimated time: 60–90 minutes, including Xray installation, key generation, and client setup.
Preparation
Before starting, prepare your tools and access credentials.
Required tools and access
- A VPS or dedicated server with a public IPv4 address. Minimum specs: 1 vCPU, 512–1024 MB RAM.
- Operating system: Ubuntu 22.04 LTS or 24.04 LTS recommended. Debian 12 also works.
- SSH access: user login with sudo privileges.
- Local device to connect from: Android, iOS, Windows, Linux, or macOS.
System requirements
- Open TCP port 443 (or alternative like 8443).
- At least 100 MB free disk space for Xray and logs.
- Accurate system time (NTP) for TLS handshakes.
What to download and install
- Server: Xray-core (latest stable version).
- Clients: v2rayNG (Android), Streisand or V2Box (iOS), v2rayN or Nekoray (Windows), Nekoray (Linux/macOS).
Tip: If you want to skip the admin hassle, buy a ready-made server with VLESS+Reality support from vpn.how — you’ll get connection details right away and save 40–60 minutes.
Backups
Backups aren’t usually needed before setup, but after creating a working Xray config, save a copy of your config file and Reality’s public key somewhere safe.
Basic concepts
Key terms explained simply
- VLESS — a modern user protocol for Xray without built-in encryption. It doesn’t waste resources on its own crypto and relies on the transport layer (like TLS or REALITY) for security and obfuscation.
- VMess — an older protocol with built-in encryption and authentication. It’s harder to analyze but leaves a more noticeable network fingerprint, so it’s more prone to filtering.
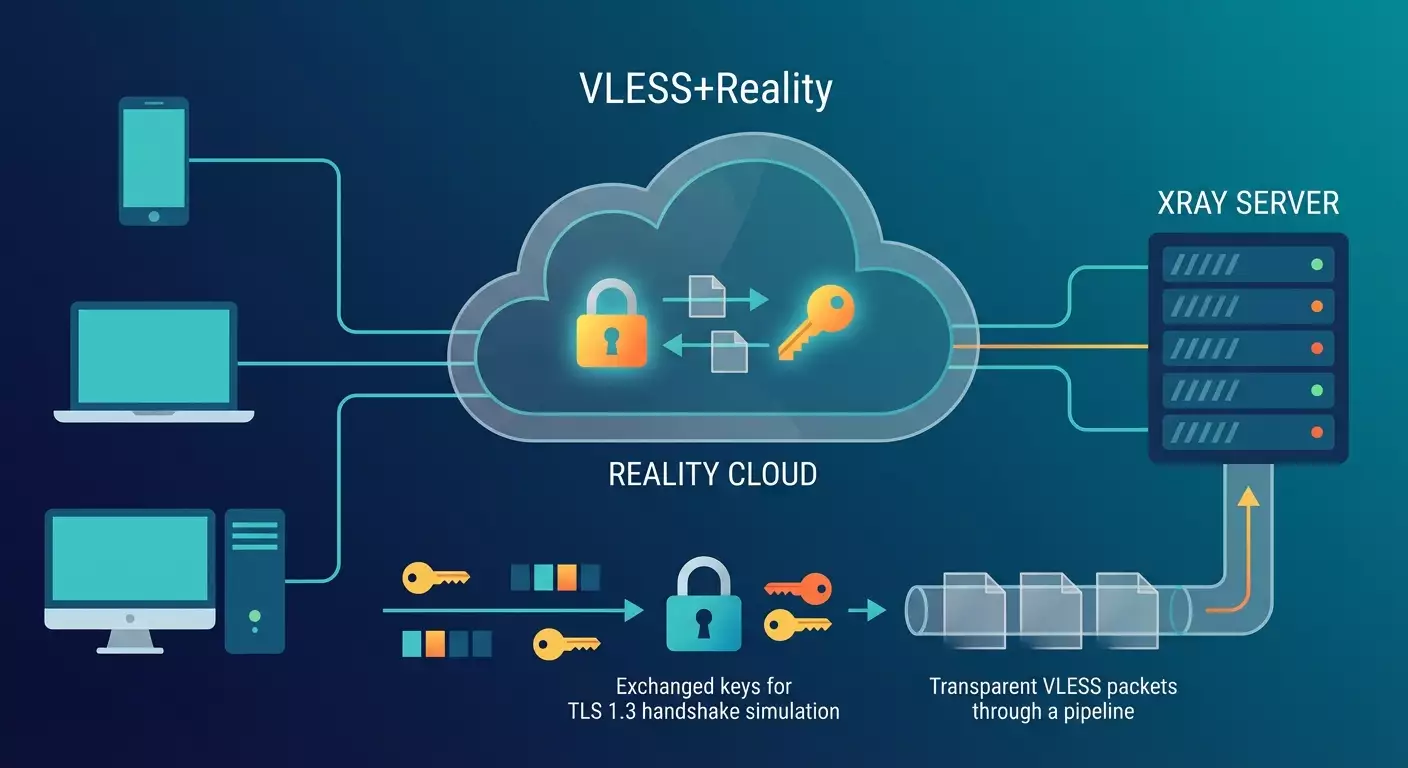
- Reality — a transport obfuscation technology in Xray. It makes your connection look like normal HTTPS traffic to a real website. To a passive observer and basic inspection, the handshake appears as a normal TLS 1.3 session to a chosen domain.
- DPI — Deep Packet Inspection, a deep analysis of packets. Often used to identify non-standard protocols and block traffic based on patterns.
How it works
VLESS acts as a "clean" channel between client and server. Reality handles transport, masking the session to look like legitimate HTTPS. Client and server exchange keys (via an X25519 pair and a shortId) to detect when and how to switch from "ordinary" HTTPS to a secured VLESS session. The handshake and parameters mimic communication with a popular "bait" website (like a major CDN domain). This makes it hard for DPI to rely on simple heuristics for detection or blocking, and active probes without the shortId or public key can’t identify the service.
Important to know before starting
- VLESS doesn’t encrypt by itself — security and disguise rely on Reality at the transport level.
- Reality mimics plausible TLS 1.3 session parameters. To observers, traffic looks like normal HTTPS without unusual extensions.
- TLS and HTTP header fingerprints are matched to popular browsers, reducing fingerprinting risk.
⚠️ Warning: Don’t use domains or IPs you don’t own as real proxy targets. In Reality, the "bait site" is for handshake disguise only — it’s not impersonating someone else’s server.
Step 1: Preparing the server and access
Goal
Set up a ready server with SSH access, open TCP port 443, and updated OS.
Detailed instructions
- Rent a VPS with a public IPv4. Choose providers with data centers close to your region to minimize latency.
- Note the server’s IP address, username, and password or SSH key.
- Connect via SSH using any client (e.g., macOS Terminal or Windows Terminal). Run ssh user@ip and confirm the connection.
- Update the system: run sudo apt update then sudo apt upgrade -y. Wait until finished.
- Install useful utilities: sudo apt install -y curl wget jq ufw ntp and ensure the time service is active: sudo systemctl enable --now ntp.
- Check that port 443 is free. If used by another service, pick an alternative port like 8443.
Tip: To save time, order a preconfigured VLESS+Reality server on vpn.how. You’ll get a ready IP, port, and connection string.
Expected result
You can SSH into the server, the system is updated, and port 443 is free.
✅ Check: Run sudo ss -ltnp | grep :443. The output should be empty (port free) or show no critical service listening.
Common issues and solutions
- SSH access fails: verify IP, username, port, and provider security settings. Temporarily open SSH port in provider’s panel.
- Port 443 occupied: stop unnecessary web servers (sudo systemctl stop apache2 or nginx) or pick port 8443 for further setup.
Step 2: Installing Xray-core
Goal
Install the latest Xray-core version — the core supporting VLESS and Reality.
Detailed instructions
- Download the Xray install script from official packages or use a package manager. The universal way: get the latest release for your architecture via curl or wget, then unpack it into /usr/local/bin. Make sure the xray binary is executable.
- Create a system user 'xray' without login: sudo useradd -r -s /usr/sbin/nologin xray.
- Create directories: sudo mkdir -p /usr/local/etc/xray and sudo mkdir -p /var/log/xray. Set ownership to user xray.
- Create a systemd unit file for Xray: set ExecStart to run xray -confdir /usr/local/etc/xray with automatic restart enabled.
- Verify that xray --version outputs the version number without errors.
Tip: Store configs in /usr/local/etc/xray to simplify backups and portability.
Expected result
Xray is installed; the service is ready to configure and runs via systemd.
✅ Check: Run xray --version and systemctl status xray. You should see a healthy status with no errors.
Common issues and solutions
- Missing dependencies: install with apt install -y ca-certificates openssl and retry installation.
- Permission errors: ensure the binary belongs to root and is executable, and directories belong to xray user.
Step 3: Generating Reality keys and VLESS UUID
Goal
Create cryptographic keys and IDs for secure handshake and client authorization.
Detailed instructions
- Generate an X25519 key pair for Reality. Run xray x25519. Save privateKey and publicKey values. The public key goes to clients; the private key stays on the server.
- Create a UUID for the VLESS user using xray uuid or uuidgen. Example: 1a2b3c4d-0000-1111-2222-abcdefabcdef.
- Define shortId — a short identifier of 8–16 hexadecimal characters. Example: a1b2c3d4e5f6a7b8. This token is known only to client and server and is required for a successful Reality handshake.
- Choose a "bait site" domain (serverName, SNI), e.g., a widely used CDN domain. It adds plausibility to the TLS handshake. The site’s actual content isn’t used; it’s set in the config as camouflage.
⚠️ Warning: Never share your Reality private key. Share the public key and shortId only with trusted clients over encrypted channels.
Tip: Use a password manager to store UUID, publicKey, and shortId to reduce input errors.
Expected result
You have three key values: VLESS user UUID, Reality publicKey and privateKey, plus the shortId and the chosen SNI domain.
✅ Check: Make sure publicKey and privateKey are properly formed (as base64 or hex strings depending on the tool), and UUID matches the standard 8-4-4-4-12 format.
Common issues and solutions
- xray x25519 command not found: confirm you installed the correct Xray binary; check path and permissions.
- Invalid UUID: regenerate; don’t use simplified or invalid strings.
Step 4: Creating the VLESS+Reality config
Goal
Build a functional Xray config with VLESS inbound, Reality transport, and proper fingerprint parameters.
Detailed instructions
- Create the file /usr/local/etc/xray/config.json. Open it with sudo nano.
- Add an inbound for VLESS with Reality. Typical structure: inbound with protocol vless, settings with clients (uuid and level), decryption none, streamSettings with security reality, realitySettings including show and keys, serverNames as a list of "bait" domains, privateKey with the private key value, shortIds array with one or more shortIds, and transport type tcp.
- Set the port 443 or an alternative like 8443 in the inbound object. Use listen 0.0.0.0.
- Enable fallback behavior for invalid clients: on wrong shortId, the server acts like a regular HTTPS bait server (default Reality behavior is plausible and safe for passive observers). This is built into Reality and requires no extra rules.
- Save the config. Test syntax: run xray -test -confdir /usr/local/etc/xray. Fix formatting errors if any appear.
- Restart the service: sudo systemctl restart xray and enable autostart: sudo systemctl enable xray.
A minimal client connection example in VLESS-URL format looks like this: vless://UUID@SERVER_IP:PORT?encryption=none&security=reality&sni=TARGET_HOST&fp=chrome&pbk=PUBLIC_KEY&sid=SHORT_ID&type=tcp#Name. Replace capitalized placeholders with your values.
Tip: Use fp=chrome or firefox in the URL. These fingerprints mimic real browsers and reduce detection risk by fingerprinting.
⚠️ Warning: Don’t use your own rarely-seen domain as sni. Pick a well-known, heavily used "bait" domain common for HTTPS traffic.
Expected result
Xray service is running, listening on the selected port, and the VLESS+Reality config is loaded without errors.
✅ Check: Run sudo ss -ltnp | grep 443 (or your chosen port). You should see an xray process listening. journalctl -u xray -b should show a successful start without errors.
Common issues and solutions
- JSON syntax errors: check commas and quotes. Use jq . /usr/local/etc/xray/config.json for validation.
- Xray won’t start: check file and directory permissions, validate keys, ensure port is free.
Step 5: Firewall and network setup
Goal
Allow incoming connections to the Reality port and optimize network settings.
Detailed instructions
- Enable UFW (if applicable): sudo ufw allow 22/tcp, then sudo ufw allow 443/tcp (or your port), then sudo ufw enable. Confirm activation.
- Enable BBR congestion control: run sudo sysctl -w net.core.default_qdisc=fq and sudo sysctl -w net.ipv4.tcp_congestion_control=bbr. To make it permanent, add these lines to /etc/sysctl.conf and apply with sudo sysctl -p.
- Synchronize time: check timedatectl status. If the timezone is incorrect, set it using timedatectl set-timezone Region/City.
Tip: For cloud servers, also open the port in your provider’s panel. Some cloud providers block traffic at the VPC level.
Expected result
The port is allowed through the firewall, network optimizations applied, time synchronized.
✅ Check: Run ufw status and confirm the port is listed as Allowed. Verify sysctl net.ipv4.tcp_congestion_control returns bbr.
Common issues and solutions
- UFW conflicts with iptables rules: temporarily disable other firewall managers or configure rules manually.
- BBR not activating: confirm kernel support with lsmod | grep bbr. If missing, update the kernel or use fq_codel as fallback.
Step 6: Connecting Android via v2rayNG
Goal
Import the VLESS+Reality profile and establish a steady connection on Android.
Step-by-step instructions
- Install v2rayNG from the official app store.
- Open the app. Tap the plus icon to add a profile.
- Choose to import from clipboard or manually. We recommend using a vless:// URL with reality parameters.
- Construct the connection URL: vless://UUID@SERVER_IP:PORT?encryption=none&security=reality&sni=TARGET_HOST&fp=chrome&pbk=PUBLIC_KEY&sid=SHORT_ID&type=tcp#AnyName. Copy it to your clipboard.
- Return to v2rayNG and paste the URL. Make sure fields like UUID, address, port, and parameters security=reality, sni, pbk, sid are filled.
- Save the profile and tap Connect. Allow VPN setup when prompted by the system.
Tip: In v2rayNG, check profile settings and ensure the fingerprint (fp) is set to chrome. This aligns the handshake fingerprint with popular browsers.
Expected result
The v2rayNG status shows Connected, and the Android notification bar displays an active VPN icon.
✅ Check: Open a browser and visit any website. Pages should load steadily. Logs in v2rayNG will note a successful handshake.
Common issues and solutions
- Handshake errors: verify the public key (pbk) and shortId match, and that sni and port are correct.
- Connected but no traffic: check app permissions and disable battery saver modes that may interrupt VPN.
Step 7: Connecting Windows via v2rayN or Nekoray
Goal
Set up a Windows client for VLESS+Reality.
Detailed instructions
- Download and install v2rayN or Nekoray for Windows. Run the app as a normal user (administrator not required).
- Click Import from clipboard and paste the VLESS URL with Reality parameters. Alternatively, add a profile manually: specify server address, port, UUID, security=reality, sni, fp=chrome, pbk, sid, type=tcp.
- Save the profile. Select it and click Connect.
- Open Windows Settings and ensure no manual proxy is enabled if using TUN mode from the client. Otherwise, enable system proxy in v2rayN if preferred.
Tip: In v2rayN, use TUN Mode for transparent routing of apps if you want system-wide traffic redirection.
Expected result
The app shows an active connection, and network apps on your PC work smoothly.
✅ Check: Open Command Prompt and ping any public domain. Latency should be stable with no packet loss. Client logs should be free of handshake errors.
Common issues and solutions
- Antivirus blocks TUN driver: add an exception for the client or switch to system proxy mode.
- Invalid profile: double-check pbk and sid, especially for extra spaces or case sensitivity.
Step 8: Connecting iOS via Streisand or V2Box
Goal
Add a profile on iOS and establish a stable connection.
Detailed instructions
- Install Streisand or V2Box from the official App Store.
- Prepare your VLESS URL with Reality parameters and send it to yourself via Notes, AirDrop, or similar.
- Open the app, tap Add Profile, select Import from Clipboard or Scan QR if you have a QR code with the same URL.
- Verify fields: server address, port, UUID, security=reality, sni, pbk, sid, fp=chrome. Save.
- Tap Connect and approve VPN profile creation on first launch.
Tip: Disable Low Power Mode on iOS during long sessions — it can limit background network activity.
Expected result
The app status shows Connected, and iOS Settings indicate VPN is active.
✅ Check: Open Safari and load several websites. Verify connection stability over 5–10 minutes.
Common issues and solutions
- Profile won’t connect: often due to typos in sid or incorrect pbk. Correct and try again.
- Session drops: disable power saving and prevent app background suspension.
Step 9: Connecting Linux and macOS via Nekoray
Goal
Set up a cross-platform client on Linux or macOS.
Detailed instructions
- Download Nekoray for your OS. Install according to project instructions.
- Launch the app. Add a VLESS profile manually or import a Reality-enabled VLESS URL.
- Check parameters: address, port, UUID, security=reality, sni, pbk, sid, fp=chrome, tcp protocol or default.
- Enable system proxy or TUN mode if you want automatic app traffic routing.
- Click Connect and monitor status.
Tip: On Linux, ensure NetworkManager and firewall-cmd don’t block TUN. Allow access or use proxy mode.
Expected result
The client connects successfully and maintains the session without drops.
✅ Check: In a terminal, run curl on several websites. Responses should be fast with no timeouts.
Common issues and solutions
- TUN interface permission issues: run client with proper rights or enable system proxy.
- Fingerprint errors: explicitly set fp=chrome or firefox for consistent handshakes.
Why VLESS+Reality resists blocking and how obfuscation works
The strength of VLESS+Reality lies in several factors. First, the plausible TLS stream: connections look like typical TLS 1.3 sessions to the "bait" domain. Observers see matching SNI and handshake parameters consistent with real HTTPS. Second, active probing without secrets is useless: without the server’s public key and shortId, connection attempts behave as normal requests to popular sites, revealing nothing about the service. Third, minimal crypto overhead: VLESS skips built-in encryption, letting Reality transport operate optimally—lowering overhead compared to classic "TLS over TLS" setups. Fourth, fingerprint resistance: clients mimic popular browser fingerprints, and the traffic lacks signatures typical of unusual protocols. Fifth, flexibility: shortIds can be rotated, multiple users managed, and access controlled without restarting infrastructure.
How Reality masks VPN traffic as HTTPS
Reality simulates a server that looks like a real website within a TLS 1.3 handshake. Client and server exchange parameters, with some signals (shortId and server public key) indicating trusted clients. External observers see normal TLS traffic to the "bait" domain: proper SNI, common client extensions, and browser-like fingerprints. This makes the traffic nearly indistinguishable from everyday HTTPS and blocks simple detection. Effectively, your VPN traffic looks just like standard HTTPS with no odd handshake clues, and certificates and session parameters don’t reveal any unusual service. On invalid handshakes, the server responds safely and plausibly from an outsider’s view.
Advantages of VLESS+Reality and who it’s for
- Almost zero encryption overhead: no double encryption, VLESS adds no crypto on top of transport. Performance and latency stay close to normal HTTPS.
- DPI resistance: stream is hard to detect as "nonstandard" since traffic behavior matches real HTTPS.
- Hard to detect by fingerprinting: using common TLS fingerprints reduces identification risk.
- Flexibility and scalability: easy to add users, rotate shortIds, use alternative ports, and various "bait" domains.
- Cross-platform: clients are available for Android, iOS, Windows, Linux, and macOS.
It’s ideal for users who want maximum connection stealth, stability, and technically correct traffic disguise as HTTPS without giveaways.
Verifying your setup
Checklist
- Xray server installed and running.
- Port 443 (or chosen) open in UFW and provider panel.
- PublicKey, privateKey, UUID, and shortId generated and safely stored.
- Xray config passes tests without errors.
- At least one client device connects and maintains session for 10–15 minutes without drops.
Testing tips
- Check Xray logs with journalctl -u xray -b to see active client sessions.
- On clients, verify no handshake or fallback errors.
- Run speed tests to compare latency and throughput versus direct connections.
Success indicators
- Stable client connections running 24+ hours.
- No TLS handshake failures in logs.
- Low latency close to native network conditions.
Common errors and fixes
- Issue: Client won’t connect. Cause: wrong pbk or sid. Fix: Verify server publicKey and shortId in profiles; no spaces or typos.
- Issue: TLS handshake error. Cause: Unsupported fp or wrong sni. Fix: Set fp=chrome or firefox and choose a well-known "bait" domain.
- Issue: No traffic post-connection. Cause: Firewall or power-saving mode. Fix: Allow ports in UFW and provider panel; disable power saving for client.
- Issue: Xray won’t start. Cause: Syntax error in config.json. Fix: Use jq to validate and fix commas, quotes, and object structure.
- Issue: High latency. Cause: Distant datacenter or busy port. Fix: Pick nearby data center, enable BBR, change ports if needed.
- Issue: Random disconnects. Cause: Unstable client network. Fix: Enable auto-reconnect in client; check Wi-Fi quality or switch to mobile data.
- Issue: Port 443 conflict. Cause: Existing web server running. Fix: Use port 8443 or advanced SNI-based routing and port remapping.
Bonus features
- Multi-user access: add multiple UUIDs and shortIds per device to simplify revocations.
- ShortId rotation: regularly change shortIds to reduce long-term analysis risk.
- Multiple "bait" domains: configure serverNames array. Clients can use different sni for more variety.
- Logging and monitoring: enable structured logs and file size limits to avoid disk overload.
- TCP optimization: tune sysctl send/receive buffer settings per channel profile.
Tip: Keep separate profiles per device to manage access and log analysis more easily.
Tip: Use descriptive profile names (e.g., Android-Pixel, iOS-iPhone, Win-Laptop) for quick ID.
Tip: Restrict IP access at the provider level if you have predictable client IP ranges for extra security.
FAQ
Q: What’s the simple difference between VLESS and VMess? A: VLESS doesn’t encrypt by itself or add extra overhead; it relies on transports like Reality. VMess includes its own crypto and has more predictable signatures, increasing filtering risk.
Q: Does Reality really make HTTPS sessions indistinguishable? A: To passive observers and basic traffic analysis, the stream looks like genuine HTTPS to the chosen domain, making detection much harder.
Q: Do I need my own domain and certificate? A: For Reality, owning a domain isn’t required; you use a "bait" domain only to mask the handshake. Your own actual certificate isn’t necessary.
Q: Which client to choose on Windows? A: v2rayN is simpler to start with; Nekoray is handy for TUN and cross-platform. Both support VLESS+Reality.
Q: How to change shortId without downtime? A: Add the new shortId alongside the old in config, restart Xray, update clients, then remove the old one.
Q: What if my provider blocks ports? A: Use standard HTTPS ports (443) or alternatives (8443). Make sure provider rules allow traffic.
Q: Can I use UDP apps? A: Yes, with clients supporting TUN mode, apps route through the tunnel. Ensure TUN is enabled.
Q: How to roll back changes? A: Restore a backup of config.json and restart Xray. If issues relate to keys, generate new X25519 keys and update clients.
Q: Where to store the public key? A: Keep the public key in a password manager. The private key stays only on the server with restricted access.
Q: How to quickly check port availability? A: From another device, run telnet SERVER_IP PORT or use client’s built-in checks.
Conclusion
You’ve learned about VLESS, how it differs from VMess, how Reality works, and why VLESS+Reality provides plausible HTTPS obfuscation with minimal encryption overhead. You prepared your server, installed Xray, generated keys, created the config, opened necessary ports, and connected devices on Android, iOS, Windows, Linux, and macOS. We covered verification, common issues and fixes, plus additional settings to boost flexibility and stability.
Ready for smooth, hassle-free operation? Buy a ready VPN server at vpn.how with VLESS+Reality support. You’ll get a tested config, working connection parameters, and save setup time.
Tip: Keep a single VLESS URL template and only change the address and port when migrating servers. This speeds up transfers and reduces errors.
⚠️ Warning: Never publish your connection details publicly. UUID, shortId, and public key should be known only to your devices.