Настройка VLESS+Reality для iOS
Пошаговая инструкция по настройке VLESS+Reality на iOS через vpn.how. За 15–25 минут вы установите приложение, импортируете конфигурацию QR-кодом или ссылкой vless://, настроите вручную при необходимости, подключитесь и проверите IP.
Содержание статьи
- Введение
- Предварительная подготовка
- Базовые понятия
- Шаг 1: установка клиента из app store
- Шаг 2: получение параметров в личном кабинете vpn.how
- Шаг 3: импорт через qr‑код
- Шаг 4: импорт через ссылку vless://
- Шаг 5: ручная настройка в streisand
- Шаг 6: подключение и проверка ip
- Шаг 7: разрешение vpn‑профиля в ios
- Проверка результата
- Типичные ошибки и решения
- Дополнительные возможности
- Faq
- Заключение
Введение
В этом пошаговом гайде вы настроите VLESS+Reality на iPhone или iPad, используя личный кабинет vpn.how и проверенные iOS-клиенты. В итоге вы получите стабильное и безопасное подключение к VPN, сможете импортировать конфигурацию через QR-код или ссылку vless://, а также вручную добавить сервер при необходимости. Мы подробно разберем каждый этап, чтобы вы уверенно дошли до результата.
Этот гайд подойдёт новичкам и опытным пользователям. Технических знаний не требуется: все действия расписаны простым языком, с точными названиями кнопок и полей.
Перед началом полезно понимать базовые термины, но мы кратко объясним всё по пути. На настройку уйдет примерно 15–25 минут, включая проверку IP и разрешение VPN-профиля в iOS.
Предварительная подготовка
Для успешной настройки вам понадобится доступ к личному кабинету vpn.how, где хранятся все параметры подключения: адрес сервера, порт, UUID, Flow, а также значения для Reality (SNI/Server Name, Public Key, Short ID, Fingerprint). Кроме того, вам нужен iPhone или iPad с актуальной версией iOS и доступ в App Store для установки приложения-клиента.
Необходимые инструменты и доступы
- Личный кабинет vpn.how (логин и пароль).
- iPhone или iPad с iOS 14.5 и выше (рекомендуется iOS 15+).
- Подключение к интернету (Wi‑Fi или мобильная сеть).
- Свободное место для установки приложения-клиента.
Что установить
- Streisand — бесплатный и рекомендуемый клиент.
- V2Box — альтернатива.
- FoXray — альтернатива.
⚠️ Внимание: Никому не передавайте ваш UUID и ключи Reality. Это конфиденциальные данные, которые дают доступ к вашему трафику.
Совет: Убедитесь, что на устройстве установлено актуальное время и дата. Неверное время может ломать шифрование и вызывать ошибки подключения.
✅ Проверка: У вас есть доступ в vpn.how и вы можете открыть App Store для установки клиента. Устройство заряжено минимум на 20%.
Базовые понятия
Прежде чем перейти к действиям, коротко разберём, что такое VLESS+Reality и зачем это нужно.
- VLESS — современный протокол передачи данных для прокси/VPN. Он быстрый, гибкий, без «лишнего» уровня шифрования, что делает его эффективным для транспорта.
- Reality — технология маскировки трафика, которая «притворяется» обычным HTTPS-соединением. Она использует публичный ключ сервера и параметры вроде SNI, Short ID и fingerprint для обмана DPI и блокировок.
- UUID — уникальный идентификатор пользователя. Его назначает ваш сервис (vpn.how) и он обязателен для доступа.
- Flow — параметр алгоритма, обычно для VLESS+Reality это xtls-rprx-vision, что обеспечивает оптимальное шифрование и пропускную способность.
- Fingerprint — «отпечаток» имитации клиента (например, Chrome или Safari), который помогает реалистично маскировать трафик.
Главная идея проста: VLESS+Reality делает ваше соединение похожим на обычный безопасный HTTPS‑трафик, сохраняя скорость и устойчивость к блокировкам.
Шаг 1: Установка клиента из App Store
Цель этапа
Установить и подготовить клиент, через который вы будете импортировать или настраивать конфигурацию VLESS+Reality.
Пошаговая инструкция
- Откройте App Store на iPhone или iPad.
- В поле поиска введите «Streisand» и установите приложение. Это бесплатный и рекомендуемый клиент.
- При желании установите альтернативы: «V2Box» или «FoXray». Они тоже поддерживают VLESS+Reality.
- Дождитесь завершения установки. Нажмите «Открыть», чтобы убедиться, что приложение запускается.
- Разрешите приложению отправлять уведомления, если хотите получать статусы подключения (опционально).
Совет: Если вы впервые пользуетесь VPN на iOS, заранее убедитесь, что у вас есть доступ к «Настройки» → «Основные» → «VPN и управление устройством». Там появится профиль после первого подключения.
✅ Проверка: У вас установлен Streisand (и при желании альтернативы). Приложение открывается без ошибок и готово к настройке.
Возможные проблемы и решения:
- Проблема: App Store не доступен. Причина: региональные ограничения или сеть. Решение: смените сеть на мобильную/другой Wi‑Fi, повторите позже.
- Проблема: Недостаточно памяти. Решение: удалите неиспользуемые приложения и фото, затем повторите установку.
Шаг 2: Получение параметров в личном кабинете vpn.how
Цель этапа
Собрать все данные для настройки: URI vless://, QR‑код и поля для ручного ввода. Все параметры подключения доступны в личном кабинете vpn.how.
Пошаговая инструкция
- Откройте браузер на iPhone или другом устройстве и войдите в личный кабинет vpn.how.
- Перейдите в раздел с конфигурациями и выберите «VLESS+Reality».
- Сохраните/запишите параметры: адрес сервера (Host/IP), порт, UUID, Flow (обычно xtls-rprx-vision), Security = Reality.
- Сохраните значения Reality: SNI (Server Name), Public Key, Short ID, Fingerprint (например, chrome или safari).
- Найдите подготовленные варианты импорта: QR‑код и ссылка формата vless:// (URI). Они сгенерированы автоматически.
⚠️ Внимание: Не изменяйте параметры наугад. Для VLESS+Reality важна точность: неверный SNI, Public Key или Short ID приведут к ошибкам соединения.
Совет: Если планируете настраивать с iPhone, держите вкладку с vpn.how открытой в Safari. Так удобно использовать «Поделиться» для открытия ссылки в Streisand.
✅ Проверка: У вас есть доступ к QR‑коду и ссылке vless://, а также все поля для ручной настройки.
Возможные проблемы и решения:
- Проблема: Не виден QR‑код. Причина: блокировка изображений. Решение: обновите страницу, откройте с другого браузера или устройства.
- Проблема: Неполный URI. Решение: скопируйте ссылку еще раз, убедитесь, что скопировано целиком от «vless://» до параметров в конце.
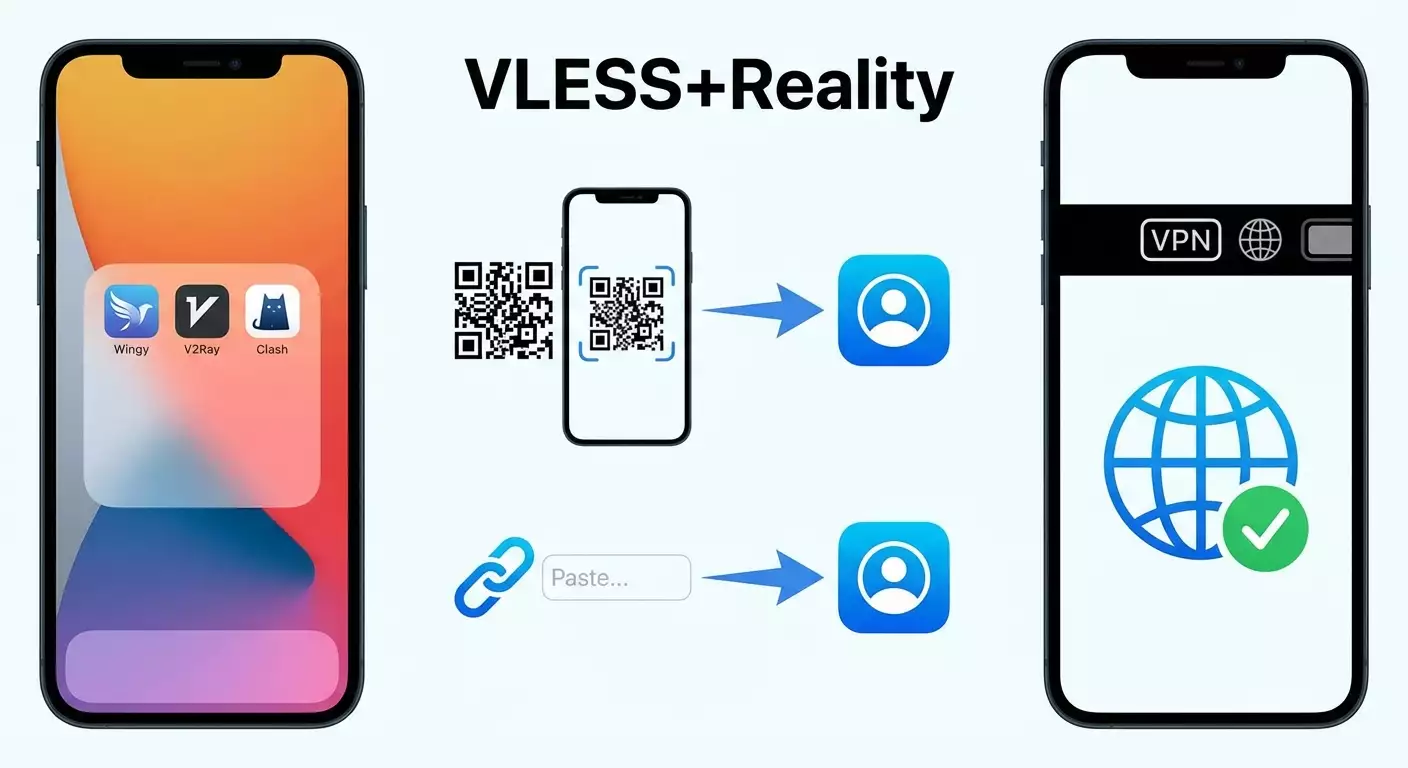
Шаг 3: Импорт через QR‑код
Цель этапа
Быстро импортировать конфигурацию в клиент, отсканировав QR‑код из личного кабинета vpn.how.
Пошаговая инструкция
- Откройте Streisand.
- Найдите кнопку для добавления сервера. Обычно это «+» или «Add» в верхнем правом углу.
- Выберите «Scan QR» или «Импорт по QR». Приложение запросит доступ к камере.
- Откройте на другом устройстве личный кабинет vpn.how и покажите экран с QR‑кодом «VLESS+Reality» либо откройте QR на этом же iPhone в Фото и используйте функцию импорта из изображения (если поддерживается).
- Наведите камеру на QR‑код. Дождитесь распознавания.
- Подтвердите импорт добавленного профиля. Проверьте, что в карточке профиля указаны корректные адрес, порт и параметры Reality.
Совет: Дайте профилю понятное имя, например «vpn.how VLESS Reality», чтобы позже быстро отличать его от других.
✅ Проверка: В списке подключений Streisand появился новый профиль. Его тип — VLESS, Security — Reality, заполнены SNI/Public Key/Short ID/Fingerprint.
Возможные проблемы и решения:
- Проблема: Камера не открывается. Причина: нет разрешения. Решение: «Настройки» → «Streisand» → включите доступ к камере.
- Проблема: QR не распознается. Причина: блики/размыто. Решение: увеличьте яркость, приблизьте камеру, разверните экран с QR.
Шаг 4: Импорт через ссылку vless://
Цель этапа
Добавить конфигурацию одним касанием, не используя камеру. Подходит, если вы находитесь на iPhone и видите ссылку в браузере или приложении.
Пошаговая инструкция
- Откройте в Safari личный кабинет vpn.how и найдите конфигурацию «VLESS+Reality».
- Нажмите и удерживайте ссылку «vless://…», затем выберите «Поделиться…».
- В появившемся меню «Поделиться» прокрутите список приложений и выберите «Streisand» (если не видно, нажмите «Еще…» и включите Streisand в списке).
- Подтвердите импорт в Streisand. Приложение откроется и добавит профиль автоматически.
- Альтернатива: нажмите «Копировать», затем в Streisand выберите «Import from clipboard» или «Импорт из буфера» — профиль добавится из скопированного URI.
Совет: Если используете V2Box или FoXray, действуйте по той же логике: «Поделиться» → выбрать нужное приложение, либо «Копировать» → «Импорт из буфера» внутри клиента.
✅ Проверка: В приложении появился новый профиль с типом VLESS и включенным Reality. Все параметры автоматически подставлены из ссылки.
Возможные проблемы и решения:
- Проблема: Ссылка не открывается в Streisand. Причина: разрешения для «Поделиться». Решение: добавьте Streisand в список «Поделиться…» через «Еще…».
- Проблема: Импорт из буфера не работает. Решение: убедитесь, что буфер содержит полную строку vless://, скопируйте заново из vpn.how.
Шаг 5: Ручная настройка в Streisand
Цель этапа
Создать профиль вручную, если нет возможности импортировать по QR или ссылке, либо нужно изменить параметры.
Пошаговая инструкция
- Откройте Streisand и нажмите «+» для добавления нового соединения.
- Выберите тип «VLESS».
- В поле «Address» введите адрес сервера из vpn.how (домен или IP).
- В поле «Port» введите порт из vpn.how (например, 443 или указанный иной).
- В поле «UUID» вставьте ваш UUID из vpn.how.
- В поле «Flow» выберите или введите «xtls-rprx-vision» (если в кабинете указано именно так).
- В разделе «Transport» выберите «TCP».
- В разделе «Security» выберите «Reality».
- В поле «SNI» (или «Server Name», «ServerNameIndication») введите значение из vpn.how (например, домен, под который маскируется трафик).
- В поле «Public Key» вставьте публичный ключ Reality из vpn.how (начинается с «…» — копируйте полностью).
- В поле «Short ID» введите короткий идентификатор из vpn.how (строка в hex/символах, указывается в кабинете).
- В поле «Fingerprint» выберите отпечаток из списка (чаще «chrome» или «safari») согласно значению из vpn.how.
- Убедитесь, что «Allow Insecure» выключен (обычно для Reality он не нужен).
- Сохраните профиль. Дайте понятное имя.
⚠️ Внимание: Ошибка в одном символе (в UUID, Public Key или Short ID) приведёт к невозможности подключения. Проверяйте значения дважды и копируйте из личного кабинета vpn.how без пробелов.
Совет: Если приложение предлагает «ALPN» или «TLS Settings», оставьте по умолчанию для Reality, если иное не указано в vpn.how. Лишние изменения могут мешать подключению.
✅ Проверка: Профиль сохранён. В его карточке видны: Address, Port, UUID, Flow = xtls-rprx-vision, Transport = TCP, Security = Reality, а также SNI, Public Key, Short ID, Fingerprint.
Возможные проблемы и решения:
- Проблема: Нет опции Reality. Причина: старая версия клиента. Решение: обновите Streisand через App Store.
- Проблема: Подсветка ошибки в поле UUID. Решение: проверьте формат, удалите лишние пробелы и переносы.
Шаг 6: Подключение и проверка IP
Цель этапа
Включить профиль и убедиться, что ваш внешний IP изменился и трафик проходит через VLESS+Reality.
Пошаговая инструкция
- Откройте Streisand и выберите созданный или импортированный профиль.
- Нажмите переключатель «Connect» или иконку подключения. Подождите 3–10 секунд.
- При первом подключении появится системное окно iOS с предложением добавить VPN‑профиль. Нажмите «Разрешить» и подтвердите с Face ID/Touch ID или код‑паролем.
- Когда статус станет «Connected», откройте Safari и зайдите на сайт проверки IP (любой нейтральный сервис или используйте встроенную проверку в приложении, если есть).
- Убедитесь, что IP и расположение изменились на те, что соответствуют серверу vpn.how.
Совет: Если часто подключаетесь, включите в настройках клиента режим «On Demand» или «Автоподключение» при открытии определённых приложений (если поддерживается клиентом).
✅ Проверка: Статус профиля — Connected, трафик идёт через VPN. Внешний IP отличается от вашего IP без VPN.
Возможные проблемы и решения:
- Проблема: Долго «Connecting…». Причина: ошибка в параметрах или сеть оператора. Решение: переключите сеть (Wi‑Fi/4G/5G), перепроверьте SNI/Public Key/Short ID/UUID.
- Проблема: Подключается, но IP не меняется. Решение: перезапустите Streisand, выключите/включите режим полёта на 5 секунд и подключитесь снова.
Шаг 7: Разрешение VPN‑профиля в iOS
Цель этапа
Корректно подтвердить установку и использование VPN‑профиля в системе iOS, чтобы соединение работало без ограничений.
Пошаговая инструкция
- При первом подключении iOS покажет окно «Streisand хочет добавить конфигурации VPN». Нажмите «Разрешить».
- Подтвердите действие с помощью Face ID/Touch ID или введите код‑пароль.
- Если окно не появилось, откройте «Настройки» → «Основные» → «VPN и управление устройством» → найдите профиль Streisand и включите переключатель.
- Вернитесь в Streisand и повторите подключение.
Совет: Если вы используете альтернативный клиент (V2Box, FoXray), процесс аналогичен: при первом подключении дайте системе разрешение на установку VPN‑профиля.
✅ Проверка: В «Настройки» → «VPN» видно активное подключение, а в приложении — статус Connected.
Возможные проблемы и решения:
- Проблема: Профиль не устанавливается. Причина: ограничения MDM или родительский контроль. Решение: временно отключите ограничение или обратитесь к администратору устройства.
- Проблема: Требуется повторное разрешение. Решение: удалите старый профиль в «Настройки» → «VPN» и заново подключитесь из приложения.
Проверка результата
Чек‑лист
- Профиль VLESS+Reality добавлен в Streisand (или альтернативе).
- Параметры совпадают с данными из личного кабинета vpn.how.
- Подключение устанавливается без ошибок.
- Внешний IP изменён, доступ к нужным сайтам работает.
Как протестировать
- Проверьте IP в браузере до и после подключения.
- Откройте 2–3 популярных сайта. Оцените скорость загрузки страниц.
- Если клиент поддерживает статистику, посмотрите, идёт ли трафик по профилю.
Совет: Для стабильности перезапустите устройство после первой успешной настройки. Это помогает системе «запомнить» новый профиль и корректно применять его.
✅ Проверка: Сайты открываются быстро, IP совпадает с сервером vpn.how, в клиенте видна активность трафика.
Типичные ошибки и решения
- Не удаётся подключиться → Причина: опечатка в UUID/SNI/Public Key/Short ID. → Решение: перепроверьте и заново скопируйте параметры из vpn.how.
- Connecting… без результата → Причина: сеть оператора/стационарная сеть фильтрует трафик. → Решение: смените сеть, перезапустите роутер, попробуйте мобильную передачу данных.
- Статус Connected, но сайты не грузятся → Причина: конфликт DNS или кеш. → Решение: включите в клиенте DoH/DoT, очистите кеш Safari, перезапустите устройство.
- Слишком низкая скорость → Причина: перегруженный сервер или слабый сигнал. → Решение: выберите другой узел в vpn.how, переместитесь туда, где лучше приём, отключите энергосбережение.
- Ссылка vless:// не открывается → Причина: не ассоциирована с приложением. → Решение: используйте «Поделиться…» → Streisand или импорт из буфера.
- QR‑код не сканируется → Причина: качество изображения. → Решение: откройте QR на другом экране, увеличьте масштаб, используйте импорт по ссылке как альтернативу.
- Профиль внезапно отключается → Причина: устройство ушло в режим энергосбережения. → Решение: отключите низкое энергопотребление и добавьте приложение в исключения, если поддерживается.
Дополнительные возможности
- Несколько профилей: добавьте несколько конфигураций из vpn.how для разных регионов. Переключайтесь в один тап.
- Правила трафика: в некоторых клиентах можно настроить, какие приложения идут через VPN, а какие — нет.
- DNS‑защита: включите DNS‑over‑HTTPS или DNS‑over‑TLS, чтобы скрыть запросы DNS.
- Автоподключение: настройте автозапуск при старте приложения или при открытии нужных сайтов и сервисов.
- Отпечаток клиента: если в vpn.how разрешено менять fingerprint, тестируйте chrome/safari/firefox для лучшей совместимости с вашей сетью.
Совет: Периодически проверяйте личный кабинет vpn.how — там могут появляться новые узлы и рекомендации по оптимизации.
FAQ
- Можно ли использовать только V2Box или FoXray? Да. Процесс импорта похож: QR‑код или vless://. Названия полей могут различаться, но параметры те же из vpn.how.
- Как быстро переключаться между серверами? Добавьте несколько профилей и меняйте активный в один тап внутри клиента.
- Нужно ли включать TLS? Для VLESS+Reality используйте Security = Reality. Дополнительные TLS‑параметры обычно не требуются, если не указано иное в vpn.how.
- Что такое Flow? Это режим шифрования/передачи для VLESS. Для Reality чаще всего «xtls-rprx-vision». Берите точное значение из vpn.how.
- Где взять Public Key и Short ID? В личном кабинете vpn.how в разделе «VLESS+Reality». Эти параметры генерирует сервер.
- Что делать, если после обновления iOS подключение сломалось? Удалите профиль в «Настройки» → «VPN», перезагрузите устройство и переподключитесь из приложения. Проверьте обновления клиента.
- Можно ли использовать один аккаунт на нескольких устройствах? Да, если политика vpn.how это допускает. Импортируйте одну и ту же конфигурацию на каждое устройство.
- Почему важно не менять SNI? SNI — часть маскировки Reality. Неверное значение ломает рукопожатие и соединение не установится.
- Насколько безопасно VLESS+Reality? Это современный стек с продвинутой маскировкой. При корректной настройке он устойчив к большинству видов фильтрации.
Заключение
Вы установили клиент на iOS, получили параметры в личном кабинете vpn.how и настроили VLESS+Reality тремя способами: через QR‑код, по ссылке vless:// и вручную. Вы подключились и проверили изменение IP, а также узнали, как решать частые проблемы и что можно оптимизировать.
Дальше вы можете добавить дополнительные профили из vpn.how, включить автоподключение и DNS‑защиту, а также настроить правила трафика. Регулярно проверяйте новые узлы и рекомендации в личном кабинете — это поможет поддерживать стабильную и быструю работу.
Совет: Сохраните этот гайд в закладки и держите под рукой: при смене устройства или переустановке клиента вы быстро повторите те же шаги и вернетесь к работе за 10–15 минут.