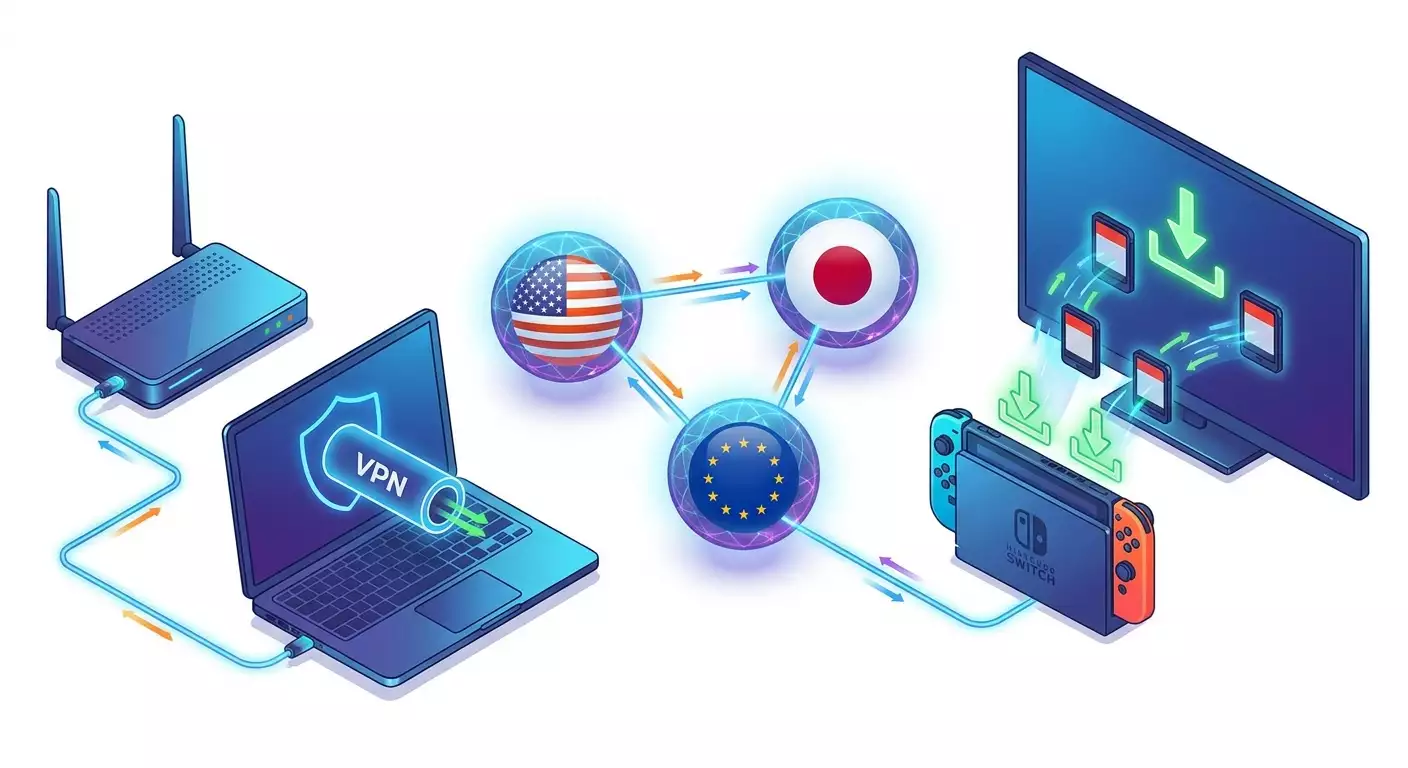
Nintendo Switch and VPN: How to Buy in the eShop and Change Your Region — Step-by-Step Guide
A detailed guide on purchasing games from the Nintendo Switch eShop and safely changing your account region. In 60–120 minutes, you’ll learn how to select a region, set up VPN via router or PC, make payments, avoid mistakes, and reduce ping.
Content of the article
- Introduction
- Preparation
- Basic concepts
- Step 1: define your region and payment strategy
- Step 2: create and prepare your nintendo account
- Step 3: connect your switch to a vpn — three working methods
- Step 4: change your nintendo account region
- Step 5: fund your wallet and set up payment
- Step 6: buy games in eshop after region change
- Step 7: return to your original region and set up multi-region use
- Step 8: optimize ping and stability for gaming and downloads
- Step 9: alternatives to constant vpn and hybrid setups
- Result verification
- Common issues and solutions
- Additional features
- Faq
- Conclusion
Introduction
In this step-by-step guide, you'll learn how to safely and properly change your Nintendo account region, purchase games from the Nintendo Switch eShop after switching regions, and set up a stable VPN connection to reduce ping and speed up downloads. We'll cover every stage—from planning to verifying your results—offer practical tips, explain common mistakes, and suggest effective alternatives. By the end, you'll have a fully functional system: choosing the best regions, making payments, and enjoying your games without losing your data or breaking service rules.
This guide is designed for Nintendo Switch beginners and works even if you’ve never changed regions or set up a VPN before. It also includes advanced sections on network optimization, router setup, and ping reduction. We use clear language, straightforward instructions, and easy checkpoints, making each step transparent and repeatable.
Before you start, it's important to know: changing your Nintendo account region is an official feature but comes with limitations on active subscriptions, wallet currency, and Gold Points. We'll explain how to handle these to avoid losses. Also, since the Switch doesn’t support built-in VPNs, you’ll need to set up a VPN on your router or PC and share the connection with your console.
Time required: setting up and buying a game in a new region typically takes 60–120 minutes, including region selection, country change, VPN setup, and payment. Subsequent purchases usually take only 5–10 minutes.
Preparation
Required Tools and Access
- Any Nintendo Switch console (Switch, Switch OLED, or Switch Lite).
- A Nintendo Account with access to the email and, if two-factor authentication is enabled, the verification code.
- A payment method valid for the chosen region: a bank card from that country, a supported wallet (like regional PayPal), or regional eShop gift cards.
- Access to a router capable of running a VPN client or a Windows/macOS PC/laptop with an active VPN connection for sharing internet.
- A stable internet connection (recommended speed 20 Mbps or higher for smooth game downloads).
System Requirements and Environment
- A router that supports VPN clients (OpenVPN/WireGuard/IKEv2) or the ability to install custom firmware (like OpenWrt) — optional if you use a PC to share the connection.
- A Windows 10/11 or macOS 12+ PC/laptop to create a hotspot or wired bridge.
- A USB-LAN adapter for the Switch (recommended for stability and ping, but not mandatory).
- Sufficient storage on the console or microSD card for game downloads.
Downloads, Installations, and Settings
- VPN client on your PC or VPN client configuration on the router (preferably WireGuard or OpenVPN protocols).
- Drivers for the USB-LAN adapter if you plan to use a wired connection to the Switch dock.
- Updated firmware for your router and console if needed.
Backup Recommendations (If Applicable)
Changing regions does not delete your saves or games. Still, it’s wise to ensure critical saves are backed up to the Nintendo Switch Online cloud (if subscribed) and local saves are intact. Check Save Data Cloud status for important games in the console’s settings.
Tip: If you plan to switch regions frequently, create a separate user profile on the console for each region. This simplifies managing purchases and avoids confusion over currencies and DLC.
Basic Concepts
Key Terms Explained Simply
- Nintendo Account Region — the country/region set in your Nintendo Account settings. Prices, currency, taxes, and game/payment availability depend on this.
- eShop — Nintendo's digital store accessible on the console and via browser through your account.
- VPN — an encrypted tunnel routing your traffic through a remote server. External services see the server’s IP, not yours.
- NAT Type on Switch — indicates network compatibility: A and B are good, C is acceptable, D may cause multiplayer issues, F means no connection.
- Gold Points — Nintendo loyalty points redeemable for discounts. They don’t transfer between wallet regions.
- DLC Region — downloadable content works only with games from the same region.
How It All Works
Changing your account region determines which store you shop in. Nintendo allows regional changes but requires your wallet balance to be zero, and active subscriptions might be paused. Payments must match the region: if your card or PayPal doesn't work, use regional gift cards. VPN helps access the store and make payments as if you're in the selected country, sometimes improving download speed and connection stability.
What to Understand Before Starting
- Games bought in one region will run on your console regardless of region, as long as DLC regions match.
- Your saves and downloaded games stay intact; region change doesn’t delete your library.
- You can’t change regions if you have funds in your wallet until they’re spent or cleared.
- For frequent switches, having separate user profiles linked to different accounts per region is convenient.
⚠️ Caution: While regional change is official, using false payment details or fake addresses may violate Nintendo’s policies. Always follow terms of service and local laws. This guide teaches setup techniques, not how to bypass restrictions.
Step 1: Define Your Region and Payment Strategy
Goal
Choose your purchase region, determine the payment method, and evaluate taxes and prices. After this, you'll have a clear plan: country, payment method, and backup options.
Instructions
- Decide your priority: lowest price, easiest payment, or largest library? Set your criteria: price, payment method, language, or download speed.
- Compare popular regions. Examples: USA — wide library, supports region gift cards; Canada — similar to USA; Turkey — often low prices but harder payment; Poland, South Africa, Norway — sometimes cheaper; Japan — exclusive games but requires local cards and knowledge of kanji.
- Check taxes. Some countries add VAT/sales tax based on address. Choose a state/region with low or no tax if your payment method supports it.
- Pick a payment method matching your region: local card, regional PayPal, or regional gift cards. If you lack cards, rely on gift codes.
- Prepare a backup plan: use gift cards if cards fail; buy via browser if eShop is blocked; switch VPN servers or protocols if unstable.
- Consider language support. For Japan or Latin America, ensure you can navigate the store or use phone translation.
Important Notes
Note: Gift cards and codes only work in their designated regions. US codes won’t work in Turkey and vice versa. When buying from third parties, verify the country, denomination, and seller reputation.
Tip: Prioritize the US or Canada if you want English interface and easy navigation. For savings, explore Turkey or Poland, but plan to pay with gift cards.
Expected Outcome
You’ve documented your chosen region, primary payment method, and backup option. You understand taxes and are ready for the next steps.
Potential Issues & Solutions
- Can’t decide on a region? Compare prices of 2–3 desired games across countries and choose the one with the best average price and simple payment.
- No access to gift cards? Try paying through friends in that country or pick another region.
✅ Check: Decision made: Region A, Payment B, Backup C. If unsure, revisit and calculate taxes and total cost.
Step 2: Create and Prepare Your Nintendo Account
Goal
Verify your existing account status, ensure your wallet balance is zero, cancel subscriptions to avoid blocks, and set security and email access properly.
Instructions
- Visit Nintendo Account’s official website on PC or phone. Log in with your email and password. Have your authenticator or SMS code handy if 2FA is enabled.
- Go to your profile info. Check the current country/region.
- Check your wallet balance. If it’s not zero, spend it on a minor purchase. Nintendo won’t let you change regions with a positive balance.
- Review active subscriptions like Nintendo Switch Online. Turn off auto-renewal. Active subscriptions may be paused or lost after region change. Plan to change region after they expire if this matters.
- Make sure you can access your email and Nintendo messages don’t land in spam. You might need email verification when making changes.
- Check linked payment methods. Cards from your old region won’t work in the new one. Be prepared to remove and add region-appropriate payment methods.
Important Notes
Note: Gold Points don’t transfer between wallet regions. Use them before switching or risk losing access in the new store.
Tip: If you have valuable saves, ensure Save Data Cloud is enabled. That way, you won’t lose progress even if you need to reset the console.
Expected Outcome
Your account is ready for a region change: zero wallet balance, auto-renewal off, verified email access, and cleared payment methods as needed.
Potential Issues & Solutions
- Can’t spend the remaining balance? Buy inexpensive content or DLC to exhaust funds.
- No verification emails? Check spam, whitelist sender, or update your email in account settings.
✅ Check: Profile shows zero balance, auto-renewal off, email access confirmed. Ready to continue.
Step 3: Connect Your Switch to a VPN — Three Working Methods
Goal
Ensure your internet traffic routes through the chosen country so the eShop, payments, and downloads run smoothly. As Switch doesn’t support built-in VPNs, we use a router, Windows PC, or Mac as a middleman.
Method A: VPN on Router
Who is it for?
Ideal if your router natively supports OpenVPN or WireGuard (e.g., many Keenetic, ASUS Merlin, or OpenWrt routers). Offers the best stability and works well for continuous use.
Steps
- Log in to your router’s web interface using admin credentials.
- Find the VPN client section (often under Internet or Advanced settings).
- Import the VPN configuration (a .ovpn file for OpenVPN or WireGuard parameters: public/private keys, server address, port, AllowedIPs).
- Choose your server country based on your plan: for example, the USA for the US eShop, or a nearby European node for better stability and ping.
- Save settings and start the VPN client. Confirm the status is Connected.
- Set up routing rules so only your Switch’s traffic goes through the VPN (use MAC or IP address). This avoids sending your whole home network through the tunnel.
- Connect your Switch to the router’s Wi-Fi or via LAN using a USB-LAN adapter.
Verification
- Router interface shows VPN connection active.
- On Switch, Network Settings and Connection Test shows successful internet and Nintendo server connectivity.
Method B: Windows 11 PC as Hotspot
Who is it for?
If your router doesn’t support VPN or access is limited, use your PC’s VPN and share the connection via Windows hotspot or Ethernet adapter.
Steps
- Install and connect VPN client on your PC (WireGuard or OpenVPN). Connect to your desired server.
- Open Windows Settings > Network & Internet and turn on Mobile Hotspot. Share your internet via your active VPN adapter.
- Set a network name and password for the hotspot and save.
- On the Switch, open Wi-Fi Settings, find your network, enter the password, and connect.
- To share via Ethernet, enable Internet Connection Sharing (ICS) on the VPN adapter and share it with Ethernet. Connect Switch LAN adapter to PC or router with ICS enabled.
Verification
- VPN is active on PC, showing an IP from your chosen country.
- Mobile hotspot is on, and Switch passes the connection test.
Method C: macOS Internet Sharing
Who is it for?
Mac users can run a VPN on their Mac and share internet via Wi-Fi or Ethernet.
Steps
- Connect to your VPN on Mac using your preferred client.
- Go to System Preferences > Sharing. Enable Internet Sharing.
- Set “Share your connection from” to your VPN or main interface if your client intercepts traffic system-wide.
- Check Wi-Fi or Ethernet under “To computers using.”
- Click Wi-Fi Options to set network name and password. Confirm enabling Internet Sharing.
- Connect your Switch to this created network.
Important Notes
Note: Not all VPN clients register their interface as a source for sharing. If Switch traffic doesn’t route through VPN, confirm the sharing adapter or consider the router approach.
Tip: For best stability and low ping, use wired connection: Switch in dock + USB-LAN adapter + VPN-enabled router, reducing packet loss and Wi-Fi speed drops.
Expected Outcome
Your Switch connects to the internet through a VPN server in the chosen country. Connection tests succeed, and eShop loads without issues.
Potential Issues & Solutions
- NAT type D or F — enable UPnP on router or set port forwarding for game ports (check game support). Make sure VPN allows outbound UDP. Switching to WireGuard sometimes helps.
- Windows hotspot doesn’t pass VPN — enable sharing specifically on VPN adapter or use Ethernet bridging.
- Low speed — try a different server/protocol and avoid overloaded VPN nodes.
✅ Check: Network test on Switch passes, eShop loads, store currency matches chosen region or updates after region change.
Step 4: Change Your Nintendo Account Region
Goal
Officially update your country/region in Nintendo Account so the eShop shows correct currency and payments work properly.
Instructions
- Log into Nintendo Account management site.
- Go to Profile or User Info and find Country/Region of Residence.
- Click Change and select your new region from the list. Note the time zone and tax info if shown.
- Save changes. Email verification or password re-entry may be requested.
- If saving is blocked, confirm your wallet balance is zero and no outdated payment methods interfere.
- After saving, sign out from the eShop on your console (press Y or choose Switch User/Sign Out), then sign back in to refresh the region. Accept updated terms if prompted.
Important Notes
⚠️ Caution: Active subscriptions may stop, and Gold Points from your previous region might become inaccessible. This is normal platform policy. Plan to switch regions after using your remaining points.
Tip: If you plan frequent region changes, consider creating separate Nintendo Accounts and console users per region to avoid repeated wallet resets.
Expected Outcome
Your region is successfully updated. eShop displays the new region and currency. You’re ready to add payment methods.
Potential Issues & Solutions
- Region change blocked — usually due to non-zero wallet balance. Spend it fully and retry.
- Region doesn’t reflect on eShop — close eShop, restart console, and log in again. Sometimes it takes up to 10 minutes to update.
✅ Check: Prices in eShop show the target region’s currency (e.g., USD, EUR, TRY) and store catalog is accessible without errors.
Step 5: Fund Your Wallet and Set Up Payment
Goal
Add valid payment options for your selected region: card, wallet (if supported), or gift codes. Ensure purchases go through on the first try.
Option 1: Regional Bank Card
- Open eShop on your console or account in a browser.
- Go to Payment Methods and choose Add Credit Card.
- Enter card number, expiration, CVC, and cardholder name. Card country must match account region.
- Enter the billing address that matches the bank’s country. Use exact address if required.
- Save the card and check if test authorization succeeds.
Option 2: Regional PayPal (Where Available)
- Select PayPal as a payment method.
- Log into PayPal with the account tied to your region.
- Authorize and return to Nintendo Account. Verify link status.
Option 3: eShop Gift Cards/Codes
- Buy a fund code for your region (e.g., "Nintendo eShop Gift Card US" for the US or "TRY code" for Turkey).
- In eShop, scroll to Redeem Code or choose Add Funds using the code.
- Enter the 16-digit code and confirm. Immediately verify the displayed currency and amount.
Important Notes
⚠️ Caution: Never try to redeem a code from a different region— it’ll be rejected, and unless the seller refunds, you will lose your money. Triple-check the region before purchase.
Tip: If your regional card fails 3-D Secure, try paying via the browser version or use gift cards. Console eShop sometimes rejects cards accepted on the website.
Expected Outcome
You have at least one working payment method: either a linked card/PayPal or funds added via gift codes. Ready to buy.
Potential Issues & Solutions
- Card payment declined — verify card region, address, 3-D Secure, and anti-fraud checks. Try browser payment, a different card, or gift codes.
- Code rejected — likely wrong region. Contact the seller for an exchange and keep proof of purchase.
✅ Check: Your wallet shows funds in the correct currency, or payment method is added and ready for test charge. No errors.
Step 6: Buy Games in eShop After Region Change
Goal
Purchase games or DLC in your new region without errors, considering taxes and currency, and start your download.
Instructions
- Open eShop on your Switch under the user linked to the new region.
- Search or browse for games. Confirm game interface language suits you. Many games offer multiple languages; some are region-specific.
- Open the game’s page. Check price, tax (if shown), and compatibility with your language and regional DLC.
- Click Buy or Proceed to Purchase. Choose payment via wallet, card, or PayPal.
- Confirm your purchase. Enter password or 2FA code if requested.
- Once paid, download begins. The game appears on the home screen with a progress bar.
Important Notes
Note: DLC only works with games from the same region. If your base game is from the US, buy US-region DLC. Mixing regions often causes compatibility errors.
Tip: To play offline without repeated license checks, make this console your Primary Console for that account. In eShop, under your profile, deregister all other consoles to assign this as primary.
Expected Outcome
The game is purchased and downloading. After installation, anyone on the console can play if it’s set as the primary console for the purchasing account.
Potential Issues & Solutions
- Payment failed at final step — revisit Step 5, try another payment method or purchase via browser.
- Game won’t download — check internet, VPN stability, or temporarily disable VPN if region is confirmed and downloads use a closer CDN node.
✅ Check: Purchase status shows "Purchased". Download runs on home screen, and game is flagged as owned in the library.
Step 7: Return to Your Original Region and Set Up Multi-Region Use
Goal
Learn how to switch back without losing your library and how to manage multiple regions without constant switching.
Instructions
- Before returning, ensure your wallet balance is zero. Spend leftover funds if any.
- Access your account profile on the web and change your country/region back. Save changes.
- On the console, log into eShop under that user and accept updated terms if prompted.
- To simplify future purchases, create separate users on your Switch with separate Nintendo Accounts for each region. This way, each account stays permanently locked to one region and currency, avoiding repeated region switches.
- Set your console as Primary for each account by logging into eShop on the console with each account and completing setup.
Important Notes
Note: Games bought on one account can be played by other users on the same console if it’s the primary console for the buying account. Check your primary console status in the eShop profile.
Tip: Name users clearly to avoid confusion: "US-Shop", "EU-Shop", "TR-Shop" — this speeds up finding the right shop and keeps DLC regions consistent.
Expected Outcome
You have switched back without loss. With a multi-region setup, you have individual user/accounts per store, and all purchases are accessible on one console.
Potential Issues & Solutions
- Gold Points vanished — they don’t transfer. Use them before switching regions.
- Games won’t launch on the second user — verify primary console setup and internet connection at first launch.
✅ Check: Both shops open under different users; purchased games are visible and playable; DLC regions match base games.
Step 8: Optimize Ping and Stability for Gaming and Downloads
Goal
Reduce online latency, speed up eShop downloads, and ensure a stable connection without drops by choosing the right server, protocol, and network settings.
Protocol and Server Selection
- WireGuard — a modern protocol with minimal overhead, usually offering the best ping and speed. Recommended for gaming and downloads.
- OpenVPN UDP — reliable and compatible with most routers. Ping can be higher than WireGuard but generally stable.
- IKEv2 — fast on mobile, handles switching well, but less common on home routers.
Tip: For minimal latency, test 2–3 nearby servers’ ping and jitter (latency variation). Pick the one with low ping and minimal fluctuations.
Geographic Considerations for Low Ping
Choose a server geographically close to you or to Nintendo’s gaming/CDN nodes. For users in Russia and nearby countries, Moscow and St. Petersburg nodes usually offer the best ping. For European Nintendo CDNs, Frankfurt or Amsterdam are reliable. Asian users may prefer Singapore; US users — New York or Chicago for the East Coast, San Jose for the West Coast; Oceania — Sydney.
Practical Router Settings
- Enable UPnP to ease NAT in peer-to-peer games. If unavailable, manually forward necessary game ports (check game support), though UPnP is typically sufficient.
- Set traffic priority (QoS) to high for your Switch’s MAC address and UDP traffic to reduce lag during other device downloads.
- Optimize Wi-Fi: use 5 GHz band with channels 36–48 or 149–161, avoid crowded networks. For max stability, use a wired connection with a USB-LAN adapter.
- Adjust MTU: default is 1500, but VPNs may work better with 1420–1450. Lower the MTU on router or VPN client and test download stability.
- Split traffic so only your Switch uses the VPN (policy-based routing), keeping other devices on direct internet to save bandwidth.
Tip: If eShop download speed drops sharply, temporarily disable VPN after purchase and restart the download. Often CDN serves content without VPN, but keep VPN on during payment.
Expert Advice on Personal VPNs
A personal VPN server with a dedicated IP is especially effective for gaming and stable eShop access. It’s more consistent, faster, and less likely to be blocked compared to shared IP pools. For instance, vpn.how offers dedicated IPs with WireGuard, OpenVPN, IKEv2, L2TP, and SSTP protocols, covering key locations like Moscow, St. Petersburg, Amsterdam, Frankfurt, London, New York, San Jose, Chicago, Singapore, Sydney, Madrid, Helsinki, Stockholm, Warsaw, Copenhagen, and Stavanger. They accept Russian bank cards (including Tinkoff, Ozon), SBP, and cryptocurrencies (USDT/BTC). Pricing starts at 490 ₽ daily or 2490 ₽ monthly with discounts for long-term plans and server setup in around 5 minutes after payment. Personal VPNs provide stable ping and usually bypass game anti-cheat blocks that target public VPNs.
Expected Outcome
Your ping and connection stability in online games improve, eShop downloads run smoothly, and your console maintains NAT Type A/B or a stable C without drops.
Potential Issues & Solutions
- Ping spikes to certain servers — pick the nearest server or switch protocol to WireGuard.
- Speed fluctuations — enable QoS, reduce MTU, and prefer wired connections.
✅ Check: No noticeable lag in online games, stable eShop downloads, Switch network test shows acceptable NAT, and packet loss under 1–2%.
Step 9: Alternatives to Constant VPN and Hybrid Setups
Goal
Minimize VPN dependency where possible, using it only for logging into eShop and payments, then operate without the VPN tunnel.
Instructions
- Turn on VPN only during region switching, eShop login, and payment. Make sure purchase completes.
- Disable VPN and check if your game download continues. Most often it will resume from the nearest CDN.
- For multiplayer, compare ping with and without VPN. Play without VPN if ping is lower; use VPN if it offers better stability.
- Use a "dual network" setup: a main Wi-Fi without VPN and a guest SSID through VPN. Switch your console between them as needed.
Important Notes
Note: If your payment method requires an IP from your card region (due to anti-fraud), perform those steps strictly via VPN in that region. VPN isn’t always required for downloads afterward.
Tip: Create two VPN profiles on your router: one for the US (for purchases) and one for your nearby node (for gaming). Use each accordingly.
Expected Outcome
You’ve reduced VPN usage to what’s necessary, ensuring max speed and stability for gaming.
Potential Issues & Solutions
- Game requires online license check periodically — keep the console set as primary for the purchaser account or connect at verification times.
- Switching networks interrupts downloads — pause before switching and resume afterwards.
✅ Check: Purchases complete via VPN, games download without VPN, and ping in games is optimal.
Result Verification
Checklist: What Should Work
- Account region changed and eShop shows correct currency.
- Working payment method: regional card/PayPal or gift codes redeem without errors.
- Purchases complete and games download.
- VPN sets up and connects on demand; Switch routes through chosen server.
- Online gaming has acceptable ping without frequent disconnects.
How to Test
- Run a network test on Switch and confirm all checks pass.
- Buy inexpensive content to test payment process.
- Compare game ping with and without VPN.
Success Indicators
- Purchases fully processed; funds are sufficient; no payment errors.
- Games launch; DLC matches region.
- Average online latency fits your network path (e.g., 20–60 ms to nearby servers, 80–120 ms to distant ones).
Common Issues and Solutions
- Issue: Can't change region. Cause: Non-zero wallet balance or active incompatible subscription. Fix: Clear balance, disable auto-renewal, retry.
- Issue: Card payment declined. Cause: Card region mismatch, 3-D Secure block, fraud suspicion. Fix: Use regional card, browser payment, regional PayPal, or gift codes.
- Issue: eShop code rejected. Cause: Wrong region code. Fix: Exchange with seller, verify region before purchase.
- Issue: eShop access error. Cause: Unstable VPN or shared IP overload. Fix: Change server, use personal VPN, switch to WireGuard protocol.
- Issue: DLC not working. Cause: DLC and base game region mismatch. Fix: Buy DLC from same region or request refund.
- Issue: NAT type D/F, can't join lobbies. Cause: Closed ports, double NAT in VPN/router. Fix: Enable UPnP, set QoS, try different VPN protocol, wired connection.
- Issue: Ping increased after VPN enabled. Cause: Server far away or overloaded. Fix: Pick closer server, reduce MTU, try different time.
Additional Features
Advanced Settings
- Policy-based routing: route only Switch traffic through VPN by MAC/IP; other devices use direct internet.
- Two SSIDs: "Gaming" via VPN and "Regular" without VPN; quick console switching.
- Flexible server choice: separate profiles for US (purchases) and nearby node (gaming).
Optimization
- QoS prioritization: high priority to UDP traffic and Switch MAC address.
- Monitor jitter and packet loss to measure connection stability beyond simple ping.
- Hardware acceleration: if router is weak, use WireGuard for better performance.
Other Tips
- Keep regional wish lists and track sales across countries manually by comparing users’ eShops on consoles.
- Set calendar reminders to check discounts periodically in different regions.
FAQ
Q: Is this legal, and will my account be banned?
A: Changing region is supported by Nintendo. Follow terms of use and use valid payment info or regional codes. Region changes alone do not cause bans.
Q: Will I lose my games after changing region?
A: No. Your library and saves remain. Check DLC compatibility.
Q: How often can I change region?
A: No strict limit but wallet must be empty each time. Frequent switching is inconvenient; separate accounts per region are better.
Q: Can I pay with a Russian card in a foreign region?
A: Usually no. Use regional cards, wallets, or gift codes.
Q: Can I keep my regional Gold Points?
A: No. Use them before switching. They don’t transfer.
Q: Should VPN be on all the time?
A: No. Mostly needed for eShop login and payment. For downloads/games, choose based on ping.
Q: Why did my game ping increase?
A: Distant or overloaded VPN server. Pick closer node and switch to WireGuard.
Q: Can multiple users share games on one console?
A: Yes, if the console is set as primary for the buying account.
Q: What if I bought a code for the wrong region?
A: Contact the seller for exchange if possible. Nintendo won’t activate the wrong code.
Q: Will there be language issues in games?
A: Depends on the game. Many have multiple languages. Check game details before purchase.
Conclusion
You’ve followed the full process: planned a cost-effective region and payment method, prepared your Nintendo account, set up VPN access, changed your region, funded your wallet, purchased a game, and optimized your network for low ping. You now confidently manage purchases across different countries’ eShops and know when and how to use VPN to maintain a stable connection.
Next steps: arrange convenient user profiles per region on your console, set two VPN profiles on your router (one for payments, one for gaming), and develop your own checklist for quick purchases. Experiment with servers and protocols to find the best ping and speeds for your games.
Where to go from here: dive deeper into policy-based routing and QoS, try a personal VPN server for predictable ping, set up a wired Switch connection for competitive gaming and streaming, and expand your library leveraging regional sales. You now control the whole process and can confidently use the eShop as you prefer.