macOS Sequoia e VPN: come creare un kill switch di sistema e configurare Network Extension
Guida passo dopo passo per configurare un kill switch di sistema per VPN su macOS Sequoia e le basi dell'API Network Extension. In 60–120 minuti installerai il client, importerai la configurazione, configurerai il filtro PF, l'automazione e verificherai l'assenza di perdite.
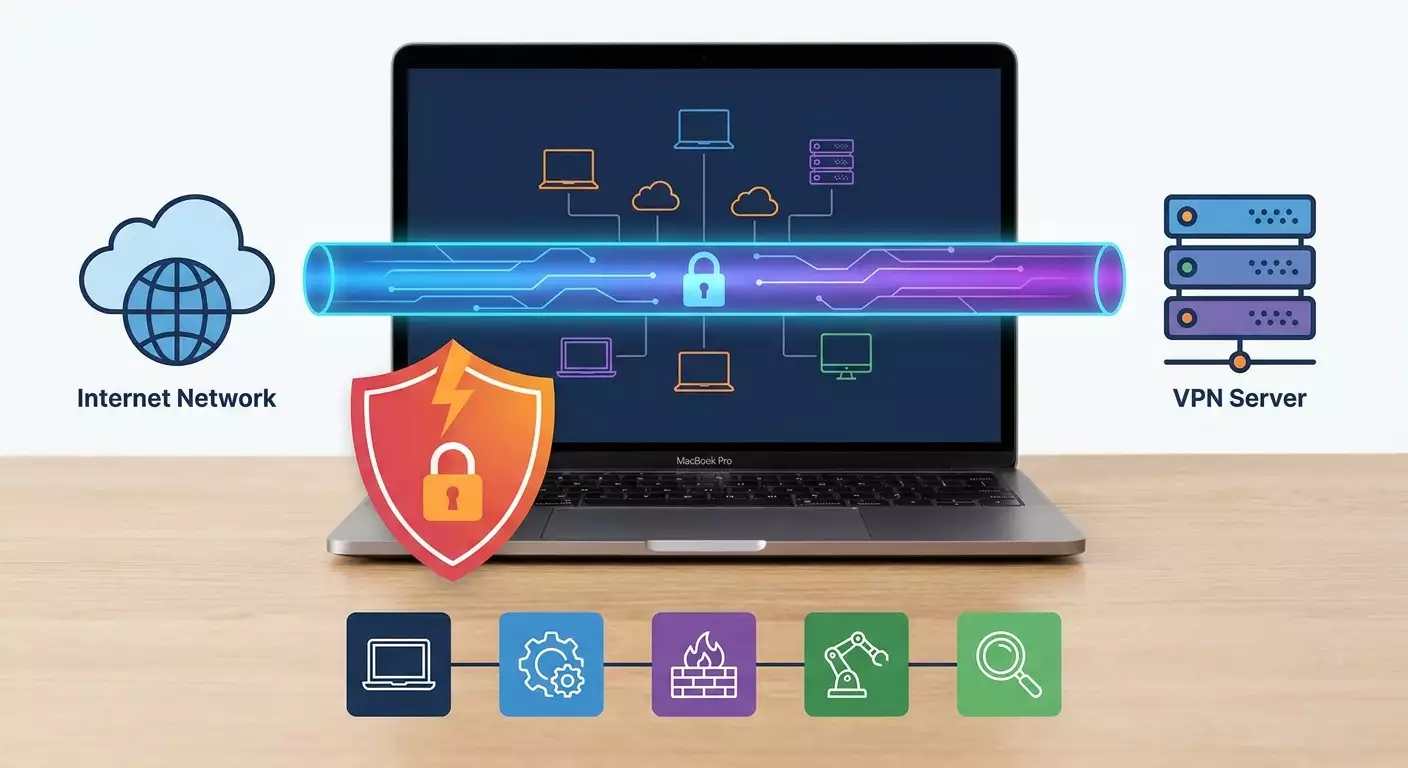
Contenuto dell'articolo
- Introduzione
- Preparazione preliminare
- Concetti base
- Passo 1: scelta del protocollo e del client
- Passo 2: importazione configurazione e primo collegamento
- Passo 3: attivazione protezione da perdite dns e on-demand
- Passo 4: kill switch di sistema via pf: configurazione base
- Passo 5: automazione kill switch: script e launchagent
- Passo 6: configurazione precisa delle regole e scenari per i vari protocolli
- Passo 7: sezione avanzata: basi network extension api per kill switch
- Passo 8: test completo: traffico, dns, cadute
- Verifica finale
- Errori comuni e soluzioni
- Funzionalità extra
- Faq
- Conclusione
Introduzione
In questa guida passo dopo passo configurerai un kill switch di sistema affidabile per VPN su macOS Sequoia e comprenderai come funzionano gli elementi chiave dell'API Network Extension. Partiremo dalla scelta del protocollo e del client fino alla creazione di regole a livello di sistema con il filtro PF e, se vuoi, approfondiremo l'integrazione avanzata tramite Network Extension. Alla fine avrai una connessione prevedibile senza perdite di traffico fuori dalla VPN, anche in caso di disconnessioni improvvise. La guida è pensata per utenti principianti, ma include sezioni avanzate per chi vuole capire i meccanismi più a fondo.
Dopo aver completato tutti i passaggi sarai in grado di: configurare il client VPN su macOS Sequoia, importare un file di configurazione pronto, attivare la protezione contro le perdite DNS, creare e verificare un kill switch di sistema usando PF, automatizzare l’attivazione e la disattivazione del filtro e, se desideri, testare un esempio minimo con l’API Network Extension.
La guida è adatta a: possessori di Mac con macOS Sequoia (aggiornato al 2026), principianti in sicurezza, sviluppatori interessati a capire i principi sottostanti e chiunque abbia bisogno di bloccare con certezza il traffico fuori dalla VPN.
Cosa sapere prima: nozioni base sulle Preferenze di Sistema, saper copiare comandi nel Terminale, conoscere cosa sono indirizzo IP e porta. Questo è sufficiente. Le sottigliezze dell’API le spiegheremo in modo chiaro e concreto.
Tempo stimato: la configurazione base di VPN e kill switch richiede 60–90 minuti, ulteriori 30 minuti per automazione e test. Per la parte avanzata con Network Extension, riserva circa 60 minuti aggiuntivi, se hai un account sviluppatore.
Preparazione preliminare
Prima di iniziare, assicurati di avere tutto il necessario. Prepareremo il sistema, sceglieremo client e configurazione, controlleremo la versione macOS e creeremo un punto di ripristino per le configurazioni di rete importanti.
Strumenti e accessi necessari
- Mac con macOS Sequoia (15.x o superiore).
- Diritti di amministratore sul dispositivo (per configurare PF e installare i client).
- File di configurazione per il protocollo scelto (WireGuard, OpenVPN, IKEv2). Può essere .conf per WireGuard, .ovpn per OpenVPN o parametri per IKEv2.
- Indirizzo IP e porta del server VPN. Meglio avere l’IP preciso e non solo il nome a dominio, per evitare dipendenze da DNS esterni durante la connessione.
- Connessione internet attiva durante la configurazione.
Requisiti di sistema
- macOS Sequoia 15.x (controlla: menu Apple → Informazioni su questo Mac → Panoramica).
- Almeno 200 MB liberi su disco per client e log.
- Connessioni in uscita aperte verso il server VPN (porte dipendono dal protocollo: WireGuard usualmente UDP 51820; OpenVPN di default UDP 1194 o TCP 443; IKEv2 UDP 500 e UDP 4500).
Cosa scaricare e installare
- WireGuard per macOS o alternativamente Tunnelblick/Viscosity per OpenVPN; per IKEv2 basta il client integrato in macOS.
- Editor di testo per modificare i file di configurazione (ad esempio TextEdit integrato o altro a piacere).
Backup
Le modifiche di rete influiscono sulle impostazioni di sistema. Prima di procedere annota lo stato attuale. Salva i server DNS correnti, le interfacce attive e la rotta predefinita.
- Apri il Terminale.
- Esegui il comando scutil --dns. Copia la sezione principale DNS in un file di testo.
- Esegui ifconfig e route -n get default. Salva l’output per riferimento.
- Se usi Time Machine, crea un punto di ripristino.
Consiglio: salva l’indirizzo IP e la porta del server VPN in una nota. Serviranno per le regole PF per consentire il traffico verso il server VPN mantenendo bloccato tutto il resto.
Concetti base
Per facilitarti, spieghiamo brevemente i termini chiave con definizioni semplici, senza teoria superflua.
- VPN — tunnel cifrato tra il tuo computer e il server VPN remoto. Tutto il traffico può transitare in questo tunnel.
- Kill switch — meccanismo che blocca qualsiasi traffico di rete se la VPN si disconnette. Protegge da perdite di dati.
- PF (Packet Filter) — filtro pacchetti di sistema in macOS. Consente di definire regole per consentire o bloccare le connessioni, indipendentemente dalle applicazioni.
- Interfaccia utun — interfaccia di rete virtuale creata dal client VPN. Ad esempio, utun0. Tutti i pacchetti VPN cifrati passano da questa interfaccia.
- Network Extension API — framework Apple per sviluppare client VPN, filtri contenuti e proxy. Permette di controllare in modo programmato il tunnel e la configurazione di rete.
- On-Demand — insieme di regole per quando e come la VPN si connette automaticamente (ad esempio su tutte le reti tranne quelle fidate) e come comportarsi in caso di perdita di connessione.
- Perdita DNS — quando le richieste DNS escono fuori dal tunnel VPN, andando direttamente su Internet, esponendo domini e eventualmente IP.
Consiglio: se incontri termini sconosciuti nei passaggi successivi, torna a questa sezione. Capire cosa sono utun e PF rende molto più semplice configurare il kill switch.
Passo 1: Scelta del protocollo e del client
Obiettivo
Decidere quale protocollo e client usare su macOS Sequoia per poi configurare la connessione e il kill switch a livello di sistema.
Istruzioni dettagliate
- Valuta il tuo scenario: vuoi la soluzione più veloce e semplice? Scegli WireGuard. Serve compatibilità con reti più vecchie? Considera OpenVPN. Vuoi integrazione nativa senza client esterni? Usa IKEv2.
- Se scegli WireGuard: installa l’app per macOS da fonte affidabile e prepara il file .conf di configurazione.
- Se scegli OpenVPN: installa Tunnelblick o Viscosity e prepara il file .ovpn.
- Se scegli IKEv2: usa il client integrato macOS. Prepara i parametri: indirizzo server (IP), identificatore remoto, identificatore locale, autenticazione (nome utente e password o certificato), e attiva l’opzione “Invia tutto il traffico”.
- Prepara l’indirizzo IP del server e la porta: per WireGuard di solito UDP 51820; per OpenVPN verifica la porta nel file .ovpn; per IKEv2 porte UDP 500 e 4500.
⚠️ Attenzione: Per un corretto kill switch di sistema è importante conoscere l’IP esatto del server, non solo il dominio. Nelle regole PF permetteremo solo connessioni verso quell’IP e porta. Se hai solo un dominio, risolvilo in IP prima e annotalo.
Consiglio: per WireGuard cerca di usare un config in cui AllowedIPs è 0.0.0.0/0, ::/0. Così il client manda tutto il traffico nel tunnel, facilitando la logica e riducendo i rischi di perdita.
Risultato atteso
Hai scelto il protocollo, installato il client (o deciso di usare quello integrato), e hai un config funzionante con IP server e porta noti.
Problemi comuni e soluzioni
- Non sai cosa scegliere. Soluzione: per macOS Sequoia WireGuard è un ottimo punto di partenza: configurazione semplice, alta velocità e bassa latenza.
- Hai solo il dominio, non l’IP. Soluzione: nel Terminale esegui dig +short tuo.dominio o nslookup tuo.dominio e annota l’IP.
- Provider blocca UDP. Soluzione: usa OpenVPN su TCP 443 o IKEv2, oppure attiva l’obfuscation se supportata dal server.
✅ Verifica: Hai in mano: protocollo selezionato, client installato (o integrato pronto), configurazione con IP server e porte conosciuti.
Passo 2: Importazione configurazione e primo collegamento
Obiettivo
Importare la configurazione nel client scelto e assicurarsi che la VPN si colleghi e trasmetta traffico.
Istruzioni dettagliate per WireGuard
- Apri l’app WireGuard su Mac.
- Clicca su «Importa tunnel» o «Add Tunnel» e seleziona il file .conf.
- Controlla che nel campo Address ci siano gli indirizzi della subnet VPN (ad esempio, 10.14.0.2/32), in PrivateKey la chiave privata, e in Peer l’Endpoint come IP:porta con AllowedIPs = 0.0.0.0/0, ::/0.
- Attiva lo switch per connettere il tunnel. L’indicatore diventerà verde e vedrai il traffico «attuale/totale».
Istruzioni dettagliate per OpenVPN (Tunnelblick)
- Avvia Tunnelblick.
- Trascina il file .ovpn sull’icona Tunnelblick nella barra menu o scegli «Aggiungi configurazione» dal menu.
- Scegli se installare «Solo per questo utente» o «Per tutti gli utenti» se necessario.
- Connettiti cliccando «Connect» vicino al profilo. Inserisci le credenziali se richiesto.
Istruzioni dettagliate per IKEv2 (client integrato)
- Apri «Preferenze di Sistema» → «Rete» → «VPN» → «Aggiungi configurazione VPN».
- Seleziona tipo «IKEv2».
- Inserisci «Server» come indirizzo IP del server.
- Compila «Identificatore remoto» (di solito dominio server) e «Identificatore locale» (tuo ID, se richiesto).
- Scegli metodo autenticazione: nome utente e password o certificato. Inserisci campi richiesti.
- Attiva «Invia tutto il traffico» (o equivalente per routing di default).
- Salva e clicca «Connetti».
vpn.how offre server VPN personali con IP dedicato. Le località, i protocolli e i prezzi disponibili sono indicati sul sito e nel tuo account. I metodi di pagamento e il totale vengono mostrati al pagamento. Scegli un server
Risultato atteso
La VPN si connette, hai accesso a Internet attraverso il tunnel e le impostazioni base corrispondono alla configurazione.
Problemi comuni e soluzioni
- Connessione non si stabilisce. Causa: porta o IP errati. Soluzione: verifica l’Endpoint nella configurazione e la porta con il provider.
- Connessione attiva ma manca internet. Causa: rotte o DNS errati. Soluzione: controlla AllowedIPs per WireGuard o l’opzione «Invia tutto il traffico» per IKEv2, aggiungi i DNS del tunnel.
- Richiesta di login ogni volta. Soluzione: abilita il salvataggio delle credenziali se la policy lo consente.
✅ Verifica: Vai su un sito che mostra il tuo IP e controlla che corrisponda all’IP VPN. Disconnetti la VPN e verifica che l’IP cambi. Questo conferma la corretta instradamento.
Passo 3: Attivazione protezione da perdite DNS e On-Demand
Obiettivo
Garantire che le richieste DNS passino sempre attraverso la VPN e che la VPN si connetta automaticamente sulle reti scelte. Questo riduce il rischio di perdite anche prima del kill switch di sistema.
Istruzioni dettagliate
- In WireGuard apri il profilo e assicurati che abbia una sezione DNS (es. DNS = 10.14.0.1 o l’indirizzo DNS del tunnel). Se manca, aggiungi il server DNS suggerito dal config per far sì che il client imposti il DNS all’avvio.
- In OpenVPN (Tunnelblick) verifica che nel file .ovpn ci sia la direttiva che imposta il DNS via push dal server (es. dhcp-option DNS 10.14.0.1). Se il server non lo imposta, configura un DNS statico in macOS dopo aver collegato la VPN (Rete → Adapter VPN → DNS).
- In IKEv2 verifica che il server fornisca il DNS via configurazione; se necessario, inseriscilo manualmente nelle impostazioni VPN.
- Attiva On-Demand se presente nel client. WireGuard offre opzioni tipo «Activate on demand» e regole SSID/rete. Tunnelblick consente «Connetti all’avvio del computer» o in Viscosity equivalente. In IKEv2 attiva «Connetti automaticamente», se supportato.
- Controlla che dopo il riavvio del Mac il client si connetta automaticamente al primo accesso alla rete.
Consiglio: se usi un Endpoint con dominio, durante la configurazione del kill switch usa l’IP per evitare problemi DNS esterni. Dopo puoi tornare al dominio aggiungendo regole PF per consentire al DNS di risolverlo solo alla prima richiesta. Per semplicità noi usiamo IP fisso in questa guida.
Risultato atteso
Le richieste DNS passano nel tunnel, la VPN si connette automaticamente. Non è ancora il kill switch finale, ma riduce già il rischio di perdite.
Problemi comuni e soluzioni
- Le richieste DNS vengono scavalcate comunque. Causa: priorità DNS di sistema. Soluzione: disabilita resolver esterni sull’interfaccia attiva o usa matchDomains nel client se supportato.
- L’autoconnessione fallisce. Causa: conflitti di policy. Soluzione: verifica impostazioni On-Demand e permessi di autostart in macOS.
✅ Verifica: Esegui scutil --dns e controlla che il resolver attivo sia il DNS del tunnel. Disconnetti la VPN, verifica che il resolver cambi. Ricollega e prova la navigazione.
Passo 4: Kill switch di sistema via PF: configurazione base
Obiettivo
Creare una configurazione PF base che blocchi tutto il traffico in uscita tranne ciò che è consentito: la connessione al server VPN per stabilire il tunnel e il traffico tramite l’interfaccia VPN dopo il collegamento.
Come funziona
Attiveremo PF di sistema e imposteremo regole: bloccare tutto di default, permettere solo il traffico sull’interfaccia utun e consentire i pacchetti in uscita verso l’IP e la porta del server VPN tramite l’interfaccia fisica per stabilire il tunnel. Così, se il tunnel cade, il traffico non esce in chiaro perché le regole lo impediscono, salvo il collegamento al server VPN.
Preparazione dati
- Annota l’IP del server VPN, es. 203.0.113.10.
- Annota la porta: per WireGuard 51820/UDP; per OpenVPN 1194/UDP o la tua porta; per IKEv2 500/UDP e 4500/UDP.
- Individua l’interfaccia fisica principale: esegui route -n get default e cerca «interface: en0» o «en1». Prendi nota del nome (es. en0).
Creazione dell’anchor PF
- Apri il Terminale.
- Crea il file anchor: sudo nano /etc/pf.anchors/vpn-killswitch.
- Incolla le regole riga per riga, sostituendo i valori con i tuoi. Usa ogni riga come punto elenco per chiarezza:
- set block-policy drop
- set skip on lo0
- block all
- pass quick on utun0 all keep state
- pass quick on utun1 all keep state (nel caso il client usi utun diverso; aggiungi anche utun2, utun3 se serve)
- pass out quick on en0 proto udp to 203.0.113.10 port 51820 keep state (per WireGuard)
- pass in quick on en0 proto udp from 203.0.113.10 port 51820 keep state (opzionale per pacchetti di risposta, anche se stateful li copre già)
- pass out quick on en0 proto udp to 203.0.113.10 port 500 keep state (per IKEv2)
- pass out quick on en0 proto udp to 203.0.113.10 port 4500 keep state (per IKEv2)
- pass out quick on en0 proto udp to 203.0.113.10 port 1194 keep state (per OpenVPN UDP, se usi UDP)
- pass out quick on en0 proto tcp to 203.0.113.10 port 443 keep state (per OpenVPN TCP 443, se configurato così)
Salva il file e chiudi l’editor. Inserisci solo le porte e protocolli usati; rimuovi il resto per restringere la superficie di attacco.
Includere l’anchor in pf.conf principale
- Apri il file di configurazione principale: sudo nano /etc/pf.conf.
- Alla fine del file aggiungi la riga: anchor "vpn-killswitch" e sotto load anchor "vpn-killswitch" from "/etc/pf.anchors/vpn-killswitch".
- Salva e chiudi.
Attivazione e verifica PF
- Controlla sintassi: sudo pfctl -nf /etc/pf.conf. Non deve mostrare errori.
- Carica la configurazione: sudo pfctl -f /etc/pf.conf.
- Attiva PF se disattivato: sudo pfctl -e.
- Controlla regole attive: sudo pfctl -sr. Dovresti vedere le tue regole.
Consiglio: Se non sei sicuro quale utun usare, aggiungi regole «pass quick on utun0..utun3». È sicuro e rende la gestione più semplice se il client cambia interfaccia dopo ricollegamenti.
⚠️ Attenzione: A questo punto potresti perdere internet se la VPN non è connessa e non hai permesso la connessione al server VPN. È normale. Basta connettere la VPN per ripristinare l’accesso tramite tunnel.
Risultato atteso
Con PF attivo, internet funziona solo se la VPN è attiva. Quando la VPN si disconnette, il traffico è completamente bloccato, tranne la connessione all’IP e porta del server VPN autorizzati.
Problemi comuni e soluzioni
- Nessuna connessione anche con VPN attiva. Causa: utun errato o mancano regole pass su utun. Soluzione: usa ifconfig per scoprire l’utun attivo dopo la connessione; aggiungilo nel file anchor; ricarica PF.
- Connessione VPN non si stabilisce. Causa: traffico in uscita verso IP server e porta bloccato. Soluzione: aggiungi la regola pass out corretta sull’interfaccia fisica.
- Endpoint con dominio non si risolve. Causa: DNS bloccato prima della connessione. Soluzione: usa temporaneamente IP invece del nome o consenti il DNS nelle regole PF, ma valuta i rischi di perdita.
✅ Verifica: Disconnetti la VPN—internet deve sparire. Attiva VPN—internet si ripristina. Esegui curl https://ifconfig.me per vedere che l’IP sia quello della VPN. Disconnetti e prova di nuovo: la richiesta dovrebbe fallire o andare in timeout.
Passo 5: Automazione kill switch: script e LaunchAgent
Obiettivo
Fare in modo che le regole PF vengano applicate automaticamente ad ogni avvio o riconnessione, e permettere di cambiare velocemente modalità se necessario.
Istruzioni dettagliate
- Crea uno script che ricarica PF e verifica lo stato delle interfacce VPN: sudo nano /usr/local/bin/vpn-ks-reload.sh.
- Incolla queste righe una per una, sostituendo i valori se serve; ogni riga è un comando indipendente:
- #!/bin/sh
- /sbin/pfctl -nf /etc/pf.conf || exit 1
- /sbin/pfctl -f /etc/pf.conf
- /sbin/pfctl -e
- exit 0
- Salva e chiudi.
- Rendi eseguibile: sudo chmod +x /usr/local/bin/vpn-ks-reload.sh.
- Crea un LaunchAgent che esegue lo script all’ingresso utente: nano ~/Library/LaunchAgents/com.local.vpnks.reload.plist.
- Incolla questo XML senza indentazioni per evitare errori:
- <plist version="1.0"><dict><key>Label</key><string>com.local.vpnks.reload</string><key>ProgramArguments</key><array><string>/usr/local/bin/vpn-ks-reload.sh</string></array><key>RunAtLoad</key><true/></dict></plist>
- Salva. Carica l’agente: launchctl load ~/Library/LaunchAgents/com.local.vpnks.reload.plist.
- Controlla: esci e rientra nel sistema o esegui manualmente /usr/local/bin/vpn-ks-reload.sh per verificare assenza errori.
Consiglio: Se vuoi disattivare temporaneamente il kill switch, esegui sudo pfctl -d. Ricorda che ciò rimuove la protezione di sistema. Per riattivare: sudo pfctl -e e sudo pfctl -f /etc/pf.conf.
Risultato atteso
Dopo il riavvio del Mac, le regole PF si attivano automaticamente. In caso di ricollegamenti VPN restano attive e coerenti. Puoi anche ricaricarle manualmente con un solo comando.
Problemi comuni e soluzioni
- LaunchAgent non si avvia. Causa: errore nel plist. Soluzione: controlla sintassi, ricarica agente, verifica launchctl list e log in Console.app.
- PF si disattiva dopo aggiornamento sistema. Soluzione: riesegui sudo pfctl -e e ricarica config; se serve, ripeti configurazione anchor.
✅ Verifica: Riavvia il Mac. Dopo il login controlla sudo pfctl -sr per vedere regole attive. Connetti e disconnetti VPN: il comportamento di internet deve rimanere quello previsto, ovvero funziona solo tramite VPN.
Passo 6: Configurazione precisa delle regole e scenari per i vari protocolli
Obiettivo
Assicurarsi che il kill switch funzioni affidabilmente con WireGuard, OpenVPN e IKEv2, considerando le peculiarità di ciascun protocollo, porte e permessi extra eventuali.
WireGuard
- Consenti solo UDP verso l’IP server e porta 51820 sull’interfaccia fisica (es. en0). È il minimo per stabilire il tunnel.
- Verifica che AllowedIPs sia 0.0.0.0/0, ::/0, essenziale per instradare tutto tramite utun.
- Controlla che il config abbia i DNS del tunnel per evitare perdite.
OpenVPN
- Se usi UDP: consenti proto udp to IP port 1194 (o porta tua) sull’interfaccia fisica.
- Se usi TCP 443: consenti proto tcp to IP port 443.
- Verifica direttive push DNS sul server o configura manualmente i DNS nel client VPN attivo.
IKEv2
- Consenti proto udp to IP port 500 e proto udp to IP port 4500 in uscita sull’interfaccia fisica.
- Nei settaggi IKEv2 attiva “Invia tutto il traffico”; altrimenti parte del traffico bypassa il tunnel, vanificando lo scopo.
- Accertati che i DNS siano instradati nel tunnel.
Consiglio: se cambi spesso rete (casa, ufficio, hotspot mobile), verifica che l’interfaccia fisica (en0, en1) non cambi. Se cambia, aggiungi regole pass per tutte le interfacce usate o usa «group egress» per permettere il traffico verso l’IP server indipendentemente dall’interfaccia fisica.
Risultato atteso
Le regole PF sono minime e precise: consentono solo il collegamento al server VPN e tutto il traffico dentro il tunnel, senza eccezioni superflue.
Problemi comuni e soluzioni
- Connessione salta passando a una nuova rete Wi‑Fi. Causa: interfaccia fisica o IP pubblico cambiati; porta bloccata dall’ISP. Soluzione: aggiungi regole per la nuova interfaccia; usa OpenVPN TCP 443 come fallback.
- Ping a risorse interne non passa. Causa: rotte o AllowedIPs. Soluzione: includi subnet interne in AllowedIPs o configura routing sul server.
✅ Verifica: Fai test ping e traceroute da VPN attiva a indirizzi esterni. Quando disconnetti la VPN, verifica che nuovi tentativi di connessione vengano bloccati e le connessioni esistenti non continuino.
Passo 7: Sezione avanzata: basi Network Extension API per kill switch
Obiettivo
Capire come usare Network Extension API per configurare parametri che influenzano il traffico e implementare un routing rigoroso nel tunnel. È opzionale e richiede account sviluppatore Apple.
Avvertenze
Per lavorare con Network Extension su macOS serve spesso abbonamento Apple Developer e abilitare opportune entitlements. Alcuni tipi di provider, come filtri contenuti (NEFilter), richiedono approvazioni extra da Apple. Per uso personale e test sul proprio Mac puoi sviluppare un’app con Packet Tunnel Provider, se hai le entitlements di base. Questa sezione è introduttiva e per pratica in ambiente di sviluppo.
Classi e flag principali
- NEPacketTunnelProvider — entry point per client VPN personalizzabile. Qui si avvia il tunnel e si impostano parametri di rete.
- NEPacketTunnelNetworkSettings — oggetto in cui si specificano impostazioni IPv4/IPv6, DNS e rotte. Flag importanti: includeAllNetworks = true e excludeLocalNetworks = true, per forzare il tunneling totale.
- NEVPNManager — gestisce la politica On-Demand e il ciclo di vita del VPN in sistema (IKEv2 e Packet Tunnel).
- NEDNSSettings — imposta il DNS nel tunnel e permette di definire matchDomains = [""] per intercettare tutte le richieste DNS.
Schema d’azione minima in Xcode
- Crea un nuovo progetto App per macOS in Xcode. Aggiungi target Network Extension di tipo Packet Tunnel Provider.
- Entitlements: attiva “Personal VPN”. Controlla che in Signing & Capabilities ci sia Network Extensions con il provider corretto.
- Nel codice del Packet Tunnel Provider crea NEPacketTunnelNetworkSettings. Specifica ipv4Settings con indirizzo tunnel (es. 10.14.0.2/32) e rotte di default (0.0.0.0/0). Imposta includeAllNetworks = true e excludeLocalNetworks = true.
- Aggiungi NEDNSSettings con DNS interno al tunnel e matchDomains = [""]. Questo instrada tutti i DNS nel tunnel.
- Salva le policy On-Demand con NEVPNManager, impostando regole di connessione su tutte le reti tranne SSID attendibili, se presenti. Per kill switch meglio non escludere nulla.
- Compila e avvia l’app in locale, installa la configurazione VPN nel sistema. Conferma richieste per il profilo se appaiono.
Consiglio: se è per uso personale e non per pubblicazione, tieni il progetto e bundle identifier legati al tuo Apple ID. Questo semplifica installazione e gestione profili sul tuo Mac.
Risultato atteso
Avrai una configurazione minimale funzionante del client custom, che di default manda tutto il traffico e DNS nel tunnel. Il kill switch di sistema è mantenuto da PF come configurato, creando insieme una doppia protezione.
Problemi comuni e soluzioni
- Entitlement mancante. Soluzione: verifica abbonamento Apple Developer e aggiungi capabilities in Signing & Capabilities.
- Profilo non installabile. Soluzione: controlla log console, firma codice, assicurati che l’app abbia i permessi di gestire VPN.
- Conflitto con client esistente. Soluzione: non avviare contemporaneamente client di sistema e custom sulla stessa interfaccia tunnel.
✅ Verifica: Nelle impostazioni di rete macOS vedrai il profilo VPN. Collegandoti, tutte le rotte e DNS passano nel tunnel. Al fermarsi del client, PF bloccherà il traffico.
Passo 8: Test completo: traffico, DNS, cadute
Obiettivo
Verificare che il kill switch funzioni bene: nessuna connessione in uscita fuori dalla VPN, nessuna perdita DNS e blocco immediato dell’accesso internet in caso di caduta del tunnel.
Piano test
- Test di routing: con VPN attiva esegui curl https://ifconfig.me e annota IP. Disconnetti VPN e assicurati che la richiesta fallisca (pervia PF).
- Test DNS: con VPN attiva esegui scutil --dns e verifica che il resolver sia quello del tunnel. Esegui nslookup example.com e controlla quale server risponde. Disconnetti VPN e assicurati che il DNS venga bloccato.
- Test caduta: con VPN attiva termina il processo client o cambia rete Wi‑Fi. Controlla che internet resti disconnesso fino alla riconnessione VPN.
- Test tempo di riconnessione: misura quanti secondi occorrono per ricollegare la VPN cambiando rete. Assicurati che PF mantenga il blocco nel frattempo.
- Test applicazioni: apri browser, messenger e media player. Controlla che funzionino solo con VPN attiva.
Consiglio: per diagnosticare usa tcpdump sull’interfaccia fisica: sudo tcpdump -i en0 not port 51820 (per WireGuard). Con configurazione corretta non vedrai traffico fuori da PF attivo.
Risultato atteso
In tutti gli scenari nessuna perdita di traffico o DNS senza VPN attiva. Quando il tunnel si ripristina, tutte le app riescono subito a comunicare.
Problemi comuni e soluzioni
- Alcuni servizi di sistema comunicano comunque. Causa: eccezioni PF non previste. Soluzione: controlla sudo pfctl -vvsr e assicurati che non ci siano regole pass inattese, soprattutto da app terze.
- Ritardi nel ricollegamento. Soluzione: abilita On-Demand per una risposta più rapida, semplifica regole PF al minimo.
✅ Verifica: Riassunto: senza VPN il traffico è completamente bloccato, con VPN tutto funziona. Il DNS passa sempre nel tunnel. Le cadute non causano perdite.
Verifica finale
Checklist
- Client VPN installato e configurato (WireGuard, OpenVPN o IKEv2).
- Configurazione corretta importata con IP e porta server.
- DNS instradato nel tunnel e On-Demand attivo.
- Anchor PF creato e aggiunto a /etc/pf.conf.
- PF attivo e regole caricate dopo riavvio.
- Internet funziona solo con VPN connessa.
- Test di caduta e perdite DNS superati.
Come testare
- Fai tre cicli: VPN attiva—controlla IP e DNS; VPN disattiva—nessuna connessione; VPN ripristinata—accesso ripristinato.
- Testa varie reti Wi‑Fi ed Ethernet.
- Analizza log PF: sudo pfctl -vvsr e sudo pfctl -vvss (stati).
Criteri di successo
- Nessuna connessione di rete senza VPN attiva (eccezioni solo verso IP e porte consentiti dal protocollo).
- DNS non risponde senza VPN e risolve correttamente nel tunnel quando attiva.
- Le app si riconnettono rapidamente con la VPN ripristinata.
Errori comuni e soluzioni
- Problema: internet non funziona anche con VPN attiva. Causa: utun sbagliato nelle regole PF. Soluzione: scopri utun attivo con ifconfig dopo connessione e aggiungi pass quick on utunX nell’anchor.
- Problema: VPN non si collega. Causa: PF blocca traffico verso server. Soluzione: aggiungi regola pass out su interfaccia fisica con porta e protocollo corretti.
- Problema: perdita DNS. Causa: DNS non configurato nel tunnel. Soluzione: aggiungi DNS in config WireGuard, o usa push DNS in OpenVPN, o imposta DNS in interfaccia VPN.
- Problema: PF si disattiva dopo aggiornamento. Causa: sistema riavvia servizi. Soluzione: riesegui sudo pfctl -e e ricarica config; assicurati LaunchAgent attivo.
- Problema: alcune app bypassano VPN. Causa: routing con eccezioni. Soluzione: controlla AllowedIPs e evita split-tunneling, usa 0.0.0.0/0 e ::/0.
- Problema: non riesci a compilare esempio Network Extension. Causa: manca entitlement. Soluzione: iscriviti ad Apple Developer e aggiungi capabilities in Xcode.
- Problema: caduta rete passando tra Wi‑Fi. Causa: porta/protocollo bloccati dal nuovo ISP. Soluzione: usa OpenVPN TCP 443 o profilo di riserva.
Funzionalità extra
Configurazioni avanzate PF
- Usa tabelle per gestire IP server, così cambiando IP aggiorni solo la tabella senza modificare tutte le regole.
- Abilita logging dei blocchi per analisi via Console.app o tcpdump -n -e -ttt -i pflog0.
- Se usi più protocolli, crea anchor separate e caricale dinamicamente.
Ottimizzazione client
- In WireGuard regola MTU (es. 1420–1440) per evitare frammentazione.
- In OpenVPN usa tls-crypt e cifrature moderne per sicurezza migliorata.
- In IKEv2 usa cipher moderni e PFS se supportati dal server.
Altre idee
- MDM e profili: su dispositivi aziendali distribuisci profili gestiti con policy On-Demand per parchi macchine.
- Profili di backup: prepara configurazione su altre porte o protocolli per reti con filtri stringenti.
- Monitoraggio: ricevi notifiche su cadute tunnel tramite eventi di sistema o script che controllano interfaccia e scrivono log locali.
Consiglio: se ti sposti spesso su reti ospiti, tieni a portata due-tre profili con porte e protocolli diversi per mantenere sempre accesso VPN.
FAQ
- Si può fare un kill switch senza PF? Sì, alcuni client hanno kill switch propri, ma PF garantisce protezione di sistema indipendente dal client.
- Serve un dominio invece di IP? Non necessariamente. Per affidabilità PF è meglio indicare l’IP. Il dominio è utile per bilanciamento e cambio indirizzi, ma richiede gestione attenta delle eccezioni DNS.
- Come capire quale utun usare? Collega VPN ed esegui ifconfig. L’utun attivo con statistiche non nulle è la tua interfaccia tunnel.
- Posso usare IPv6? Sì. Aggiungi ::/0 nelle rotte e verifica il supporto server. Le regole PF per IPv6 sono analoghe, considera protocolli e indirizzi.
- Cosa se non sono Apple Developer? Nessun problema. Il kill switch principale con PF funziona senza Network Extension. La parte avanzata è opzionale.
- Devo tenere PF sempre attivo? Sì, se vuoi kill switch permanente. Disattivalo solo consapevolmente e temporaneamente.
- Come aggiornare in sicurezza la configurazione? Disconnetti VPN, aggiorna config, verifica sintassi PF, attiva VPN e ricarica PF. Tieni sempre IP e porte server a portata.
- Le reti locali (stampanti, NAS) funzionano? Di default no, se tutto passa nel tunnel. Aggiungi eccezioni nel routing VPN per subnet locali, accettando i rischi di split-tunneling.
- Come evitare perdite WebRTC? Disattiva WebRTC nel browser o usa estensioni; soprattutto tieni attivo il kill switch di sistema con routing completo.
- Posso automatizzare il cambio profili? Sì. Usa script o funzioni client (WireGuard ha CLI), mantenendo PF fisso se IP server sono gestiti con tabelle.
Conclusione
Hai completato il percorso: scelto protocollo e client, importato configurazione, configurato DNS e On-Demand, attivato kill switch di sistema tramite PF, automatizzato il processo e testato in scenari diversi. Il risultato è uno schema affidabile in cui il tuo traffico esce su internet solo attraverso la VPN e, in caso di disconnessione, è completamente bloccato a livello di sistema.
Puoi proseguire perfezionando le configurazioni per più server e protocolli, implementare regole PF basate su tabelle, approfondire l’API Network Extension per client personalizzati e usare profili gestiti in ambito aziendale. Con una configurazione accurata ottieni alta robustezza, prevedibilità e sicurezza, oltre a una diagnosi trasparente tramite log PF.
Consiglio: rivedi regolarmente le regole, soprattutto dopo aggiornamenti macOS, e verifica che il comportamento rimanga stabile. Lo script di ricarica PF e la checklist nella sezione “Verifica finale” ti aiuteranno a controllare rapidamente il funzionamento corretto.
⚠️ Attenzione: non aggiungere eccezioni PF extra «per sicurezza». Più la lista di permessi è breve e precisa, più affidabile è il kill switch e meno imprevisti avrai cambiando rete.
Editore: vpn.how