Setting Up VLESS+Reality for Windows
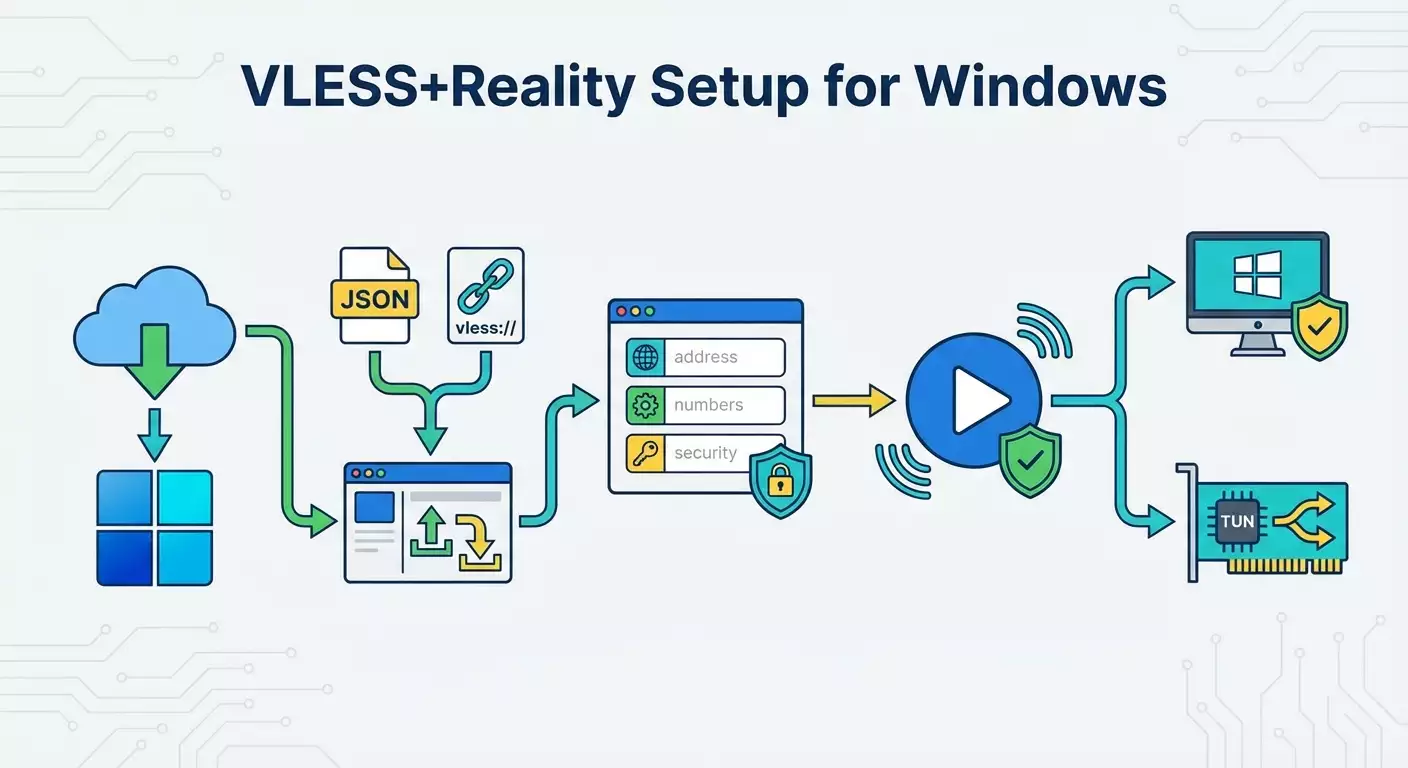
Step-by-step guide to configuring VLESS+Reality on Windows using v2rayN and alternatively via Nekoray. In 20–40 minutes, you'll learn how to download, import vpn.how configs (JSON and vless://), start connections, choose between system proxy or TUN mode, and troubleshoot common issues.
Content of the article
- Introduction
- Preparation
- Basic concepts
- Step 1: installing v2rayn
- Step 2: importing json configuration
- Step 3: importing via vless:// link
- Step 4: manual vless+reality setup
- Step 5: starting—choose server, hit enter, check connection
- Step 6: system proxy vs tun mode—when to use each
- Step 7: alternative—nekoray (windows, linux, macos)
- Checking your setup
- Common errors and how to fix them
- Faq
- Conclusion
Introduction
In this step-by-step guide, you'll learn how to set up a secure and stable VLESS+Reality connection on Windows with the v2rayN app. We'll walk through everything from downloading the program to choosing your network mode (system proxy or TUN), and cover three ways to add a vpn.how server: importing JSON, importing via a vless:// link, and manual setup by filling in all fields (address, port, UUID, Flow, Security: reality, SNI, Public Key, Short ID, Fingerprint: chrome). By the end, you'll have a fully working connection and a clear understanding of how to test it and troubleshoot if something goes wrong.
This guide suits both beginners and experienced users: we avoid complicated jargon and explain each step with simple tips and checkpoints. No prior knowledge is needed, just basic familiarity with Windows.
The entire process takes about 20–40 minutes: less if you import a ready-made config from your vpn.how dashboard, slightly longer if you choose manual setup or TUN mode with driver installation.
Goal: set up a fully functional VLESS+Reality, learn to quickly import vpn.how servers, and confidently switch between modes to suit your needs.
Preparation
What You’ll Need
- A Windows 10 or Windows 11 computer (current as of 2026).
- Internet access (to download and sign in to vpn.how).
- A vpn.how account with an active subscription or valid login credentials.
- Free disk space (200–500 MB is enough).
System Requirements
- User rights to run programs and install drivers if using TUN mode.
- Latest Windows updates and network adapter drivers for best compatibility.
What to Download and Where to Get Your Config
- v2rayN app for Windows. Find it on the official developer repo by searching "v2rayN" on popular source code hosting sites. Look under "releases" for a file that usually includes "With-Core" or "64-bit" in its name. Download the ZIP archive to unpack and run it without installation.
- VLESS+Reality config from your vpn.how dashboard. There’s a separate section or tab named "VLESS+Reality" where you can download the JSON config or copy the vless:// link.
Tip: Create a folder in advance, for example, C:\Tools\v2rayN, to keep the program and configs together. This helps you quickly find files when importing.
About Backups
If you already have v2rayN installed, back up your current settings before you start: copy the entire program folder, including the guiNConfig.json file. This makes it easy to revert to your previous setup.
⚠️ Note: If you're on a corporate computer, check with your administrator whether you can install network drivers (for TUN) and change system proxy settings. Some organizations restrict this due to security policies.
Basic Concepts
Key Terms in Simple Language
- VLESS — a modern, lightweight protocol used by the client and server to exchange data.
- Reality — a traffic masking and encryption technology at TLS 1.3 level that looks like regular secure traffic without needing client certificates.
- UUID — your unique server account identifier provided by vpn.how. Copy it exactly with no spaces or extra characters.
- SNI — the domain name used to mask the traffic. Provided by vpn.how; enter it exactly as given, with correct dots and no extra spaces.
- Public Key — the server’s Reality public key. Without this, the connection won’t establish.
- Short ID — a short identifier also provided by vpn.how involved in client-server verification.
- Flow: xtls-rprx-vision — the recommended mode for VLESS+Reality. Set this in the client separately.
- System proxy — v2rayN proxies only apps that honor system proxy settings (browsers, messengers, etc.).
- TUN mode — a virtual network adapter that routes all Windows traffic, including apps that ignore the system proxy, at a lower level.
What’s Important to Know
With v2rayN, you can add a server using any of three methods. Importing JSON is perfect if you downloaded a ready-made config from vpn.how. Importing via vless:// link is faster if the config is given as a single string. Manual setup is useful if you want full control or to quickly double-check values. Connection mode—system proxy or TUN—depends on your needs: system proxy usually works for browsers; for games and apps that bypass proxy, use TUN.
Tip: If unsure, start with system proxy. It’s simpler, launches quicker, and doesn’t require driver installation. You can switch to TUN later if needed.
Step 1: Installing v2rayN
Goal
Download, unpack, and launch v2rayN on Windows to prepare for importing vpn.how servers.
Step-by-Step Instructions
- Open your browser and search for "v2rayN releases." Visit the official developer repository’s releases section.
- Find the latest stable version, paying attention to the date and the "latest stable" label.
- Download an archive labeled as a full build, like With-Core or 64-bit, which includes all necessary executables.
- Create a folder, e.g., C:\Tools\v2rayN.
- Unzip the archive into the folder. Verify v2rayN.exe and a subfolder with the core (v2ray or Xray, depending on the build) appear.
- Launch v2rayN.exe. If a User Account Control prompt appears, confirm to continue.
- At first launch, the window might be empty. You’ll see menu items at the top like Servers, Subscriptions, and Settings—that’s normal.
⚠️ Note: If your antivirus or SmartScreen warns about an unknown publisher, click "More info" and "Run anyway" as long as you downloaded from the official repo. Unsigned open-source tools often trigger warnings but are safe.
Tip: Add the v2rayN folder to your antivirus exclusions to prevent false alerts during core updates or TUN use.
✅ Check: The main window opens, Servers menu is accessible, no errors on launch. The program icon may appear in the system tray.
Common Issues and Fixes
- Issue: Program doesn't start. Cause: SmartScreen blocking. Fix: Right-click the file, select Properties, check "Unblock," apply, and try again.
- Issue: Core files missing. Cause: Downloaded archive lacks core. Fix: Download the With-Core build or use v2rayN's core download option in settings.
Step 2: Importing JSON Configuration
Goal
Import a ready-made VLESS+Reality JSON config from vpn.how to quickly set up a working connection without manual entry.
Step-by-Step Instructions
- Log in to your vpn.how dashboard and open the VLESS+Reality section.
- Click the button to download the JSON config. Save it to a folder like C:\Tools\v2rayN\configs.
- Open or switch to v2rayN. In the top menu, click Servers.
- Select "Import client config from file." A file dialog will open.
- Navigate to your JSON file and click Open.
- After import, the server will appear in the list. Confirm the name is clear (often includes location or vpn.how tag).
Tip: If vpn.how offers a "Copy JSON config" button, you can import directly via Servers → Import client config from clipboard to avoid saving a file.
✅ Check: A new server appears in v2rayN’s list. Selecting it shows VLESS type and Reality parameters in the side or bottom panel, depending on your interface version.
Common Issues and Fixes
- Issue: Import option is greyed out. Cause: Clipboard empty or wrong file type. Fix: Ensure you’re importing valid JSON or redo the import from the file.
- Issue: Parsing error in logs. Cause: Corrupted file. Fix: Re-download the config from vpn.how.
Step 3: Importing via vless:// Link
Goal
Add a server using the short vless:// link from vpn.how for a quicker setup than using the JSON file.
Step-by-Step Instructions
- In your vpn.how dashboard, go to VLESS+Reality and find the button to copy the URI or vless:// link.
- Click Copy to place the vless://... link into your clipboard. Confirm you copied it properly.
- Switch to v2rayN and open the Servers menu.
- Select "Import from clipboard" (often shows Ctrl+V next to it, but choose the menu item).
- If done correctly, v2rayN will create a server entry from the link and add it to the list.
Tip: If you have multiple vless:// links, copy and import them one at a time. v2rayN parses single entries more reliably, especially if the clipboard has no extra text.
✅ Check: New server is listed. Its properties show VLESS protocol, Security: reality enabled, and Flow: xtls-rprx-vision.
Common Issues and Fixes
- Issue: Server doesn’t appear after import. Cause: Clipboard doesn’t contain a vless:// link. Fix: Re-copy the exact link from vpn.how and try importing again.
- Issue: Extra space at start/end breaks import. Cause: Incorrect copying. Fix: Use the official copy button in vpn.how.
Step 4: Manual VLESS+Reality Setup
Goal
Create a connection by hand to understand each field’s purpose and verify settings yourself.
Step-by-Step Instructions
- Open v2rayN and click Servers.
- Select Add [VLESS] server. A server settings window opens.
- In the Address field, enter the server address from your vpn.how dashboard. For example: nodeX.vpn.how or an IP address. Enter it exactly.
- In Port, enter the port number given for VLESS+Reality, such as 443 or whichever is provided.
- In UUID, paste your unique identifier from vpn.how. For example: 123e4567-e89b-12d3-a456-426614174000 (just an example—use your own).
- Find the Flow field and select xtls-rprx-vision. This is required for Reality to work correctly with VLESS.
- Set Security to reality. This is a key step: this encryption and obfuscation type matches the server’s setup.
- Additional Reality fields appear. Fill in SNI with the domain given by vpn.how, e.g., cdn.example.com.
- Paste the Public Key (Reality server’s public key) exactly as provided.
- Enter the Short ID copied from vpn.how. Usually 8–16 characters but use the exact one supplied.
- Choose Fingerprint and select chrome to emulate a Chrome client for better compatibility.
- Check transport: for VLESS+Reality in v2rayN, the default is TCP. TLS is not enabled separately since Security: reality handles that. Ensure TCP is selected and options like gRPC or WebSocket are off unless vpn.how instructions say otherwise.
- Make sure AllowInsecure is off (false). Reality doesn’t need client certificate trust but keep security strict.
- Save your settings (OK or Save).
Tip: Double-check your values against vpn.how: Address, Port, UUID, SNI, Public Key, Short ID, Flow, and Fingerprint. One wrong letter or space often breaks the connection.
✅ Check: Your manually created VLESS+Reality server appears in the list. Opening its properties shows Flow: xtls-rprx-vision, Security: reality, and filled SNI, Public Key, Short ID, Fingerprint: chrome.
Common Issues and Fixes
- Issue: No Reality tab visible. Cause: Outdated v2rayN version. Fix: Download a newer build supporting Reality (version 2024+), then retry setup.
- Issue: Server won’t connect. Cause: Typo in SNI or Short ID. Fix: Carefully reverify values from vpn.how.
Step 5: Starting—Choose Server, Hit Enter, Check Connection
Goal
Activate your selected server, launch the connection, and confirm traffic goes through VLESS+Reality.
Step-by-Step Instructions
- Open your server list in v2rayN. Click the vpn.how server you want to use.
- Press Enter or right-click and choose Connect (or "Set as active and connect" depending on language).
- At the bottom, open the Logs tab (or Console/Log) to watch the status. You should see a message about the service starting without errors.
- If using system proxy mode, make sure system proxy is enabled in v2rayN with the "Enable System Proxy" button.
- Open a browser and check your IP via any popular IP check service (search "my ip"). The IP should differ from your ISP’s and match or closely match your server’s location.
Tip: If you have multiple vpn.how servers (like different locations), connect to one at a time and check the IP. This helps you find the fastest and lowest latency node for you.
✅ Check: No critical errors in logs, your browser’s IP changed, websites load quickly and reliably. Your connection is active.
Common Issues and Fixes
- Issue: No internet after connecting. Cause: System proxy enabled but browser cached DNS. Fix: Restart your browser, flush DNS cache (ipconfig /flushdns), or switch to TUN mode.
- Issue: Logs show handshake error. Cause: Wrong Public Key or SNI. Fix: Double-check values and re-import the config from vpn.how.
Step 6: System Proxy vs TUN Mode—When to Use Each
Goal
Understand the differences between modes, choose the one that fits your needs, and enable it correctly.
System Proxy
System proxy changes proxy settings in Windows. Most browsers and messengers obey these settings. It’s the simplest way to get started.
How to Enable
- In v2rayN, find the "Enable System Proxy" button (or via menu: System Proxy → Set system proxy).
- Ensure your server connection is active (see Step 5).
- Open your browser and check if sites load and your IP has changed.
Tip: If using multiple browsers, make sure none ignore system proxy settings (rare, but possible in some custom builds).
TUN Mode
TUN creates a virtual network interface routing all Windows traffic through it, including apps that don’t honor system proxy. This is great for games, streaming clients, and any apps that bypass proxy settings.
How to Enable
- In v2rayN, open the TUN menu and select "Enable TUN mode" (or similar, depending on your version).
- On first launch, the program will prompt you to install the virtual adapter driver (usually Wintun). Confirm the installation.
- Wait for the process to finish. You may see a new network interface or activity icon in the system tray.
- Check that the server is connected and the logs show no routing errors.
⚠️ Note: Some security policies or corporate protections may block driver installs. If installation fails, use system proxy or ask your admin for help.
Tip: For latency-sensitive games, choose the nearest vpn.how server and use TUN to ensure game traffic goes securely through the tunnel.
✅ Check: All traffic routes change in TUN mode. Verify IP in browser, then run an app that previously ignored proxy (game or client) and confirm it works through the tunnel (check speed/access or in-app network indicators).
Common Issues and Fixes
- Issue: Internet lost after enabling TUN. Cause: Route conflicts. Fix: Disable TUN, restart v2rayN, enable TUN again; reboot Windows if needed.
- Issue: Driver won’t install. Cause: Insufficient rights. Fix: Run v2rayN as administrator or use system proxy instead.
Step 7: Alternative—Nekoray (Windows, Linux, macOS)
Goal
Introduce an alternative client if v2rayN isn't convenient or if you use multiple platforms. Nekoray is cross-platform and works great with VLESS+Reality.
Step-by-Step for Windows
- Search for "nekoray releases" to find the official repo. Download the Windows ZIP package.
- Unpack it to a folder, e.g., C:\Tools\Nekoray.
- Run the Nekoray executable. It creates working directories on first launch.
- To import a vpn.how server, use two methods: import from vless:// link (Import from clipboard button in main window) or import JSON config (Import button, then select file).
- Select the profile and click Start or Activate to connect. The status bar will show "Connected."
Tip: On Linux or macOS, Nekoray lets you use the same vless:// config you copy from vpn.how without extra adjustments. It’s handy for switching between systems.
✅ Check: The profile status changes to connected, and your browser IP check confirms routing through VLESS+Reality.
Common Issues and Fixes
- Issue: Reality not visible. Cause: Old Nekoray version. Fix: Download an updated build from 2025–2026 with Reality support.
- Issue: No internet in apps. Cause: System proxy not enabled in Nekoray settings. Fix: Enable system proxy or TUN (if supported).
Checking Your Setup
Checklist
- v2rayN installed and launches without errors.
- vpn.how server added via JSON, vless://, or manual entry.
- VLESS+Reality parameters correct: Flow: xtls-rprx-vision, Security: reality, SNI, Public Key, Short ID, Fingerprint: chrome.
- Connection active with no critical errors in logs.
- Browser IP changed and sites load stably.
- You understand the difference between system proxy and TUN and can enable the appropriate mode.
How to Test
- Visit 2–3 popular websites and observe page load speed.
- Download a test file or stream 1080p video and watch for smooth playback without buffering.
- If using TUN, check an app that previously ignored proxies (games, clients). It should now run through the tunnel.
Success indicators: stable connection without drops, consistent external IP for 10–15 minutes, no handshake errors, speeds matching your network and vpn.how server capabilities.
Common Errors and How to Fix Them
- Issue: Can't connect, logs show handshake failure. Cause: Incorrect Public Key or SNI. Fix: Compare fields with vpn.how dashboard; re-import vless:// or JSON config.
- Issue: Connection established but websites won’t load. Cause: System proxy not enabled or browser cached DNS. Fix: Enable system proxy in v2rayN, restart browser, run ipconfig /flushdns.
- Issue: Speeds lower than expected. Cause: Server is far with high latency. Fix: Switch to a closer vpn.how node and test ping/speed.
- Issue: Apps ignore the tunnel. Cause: Only system proxy active. Fix: Enable TUN mode, install driver, verify routing.
- Issue: v2rayN fails to import vless:// link. Cause: Link copied incompletely. Fix: Use vpn.how’s Copy button again and import via Servers → Import from clipboard.
- Issue: Connection unstable after laptop wakes from sleep. Cause: Network adapter error. Fix: Disable/re-enable connection in v2rayN; restart TUN or reboot Windows if needed.
- Issue: Antivirus blocks v2rayN. Cause: False positive. Fix: Add the v2rayN folder to antivirus exceptions and confirm archive authenticity.
Tip: If issues don’t consistently reproduce, enable detailed logs and note error timestamps. This helps quickly identify causes.
FAQ
Q: How do I choose between JSON or vless:// import?
A: Both achieve the same result. vless:// is quicker, skipping file save. JSON is handy if you want to keep configs locally or share them offline.
Q: Is using Reality without client certificates safe?
A: Yes. Reality secures connections server-side without needing client certificates. Just enter Public Key, SNI, and Short ID correctly.
Q: Why is Flow: xtls-rprx-vision needed?
A: It’s the recommended mode for VLESS+Reality, improving efficiency and compatibility. Missing it may cause connection refusal.
Q: Should I enable TLS separately in v2rayN?
A: No. Security: reality covers all necessary encryption fields (SNI, Public Key, Short ID). TLS isn’t turned on separately.
Q: When is it better to use TUN over system proxy?
A: Use TUN if your app ignores system proxy or you want all traffic tunneled. System proxy normally suffices for browsers.
Q: Why doesn’t my IP change after connecting?
A: System proxy may be off or browser uses its own network settings. Enable system proxy or switch to TUN, restart browser, and flush DNS cache.
Q: Can I use the same configs on another PC?
A: Yes, but mind your vpn.how subscription limits. Import the same JSON or vless:// link on another device.
Q: What if v2rayN says "outdated core"?
A: Update to the latest v2rayN With-Core build or update the Xray/V2Ray core in client settings.
Q: Does Fingerprint choice affect speed?
A: Indirectly. "Fingerprint: chrome" boosts compatibility. Speed mainly depends on your network and server proximity.
Q: Can I run this without admin rights?
A: Yes, system proxy works under normal user rights. TUN mode typically requires admin rights to install drivers.
Conclusion
You’ve set up VLESS+Reality on Windows with v2rayN, learned to import vpn.how servers through JSON, vless://, and manual setup. You now know how to start connections, verify IPs, read logs, and understand the difference between system proxy and TUN mode. When errors occur, you know where to look—from checking SNI and Public Key to updating cores and enabling TUN.
Next steps: save your working configs, note your fastest vpn.how servers by speed and latency, and set v2rayN to start with Windows if you use it regularly. Learn hotkeys for quicker connection switching. If you use multiple OSes, consider Nekoray as a versatile cross-platform option.
Tip: Check for v2rayN updates and vpn.how config freshness every few weeks. New versions improve stability, compatibility, and sometimes speed.